Webhooks require a Professional or Enterprise plan. Teams on the Free plan will see an upgrade prompt instead of the webhook configuration.
Why use webhooks
- Real-time sync — Keep your HRIS, payroll, or calendar system in sync without polling the API
- Reduced API calls — Events are pushed to you, so you don’t need to query for changes
- Flexible automation — Trigger custom workflows (e.g., update Google Calendar, notify an external channel, sync with your HR tool) based on specific leave events
- Selective delivery — Subscribe only to the events you care about
Supported events
Spock sends webhook notifications for six leave request lifecycle events:| Event | Description |
|---|---|
absence_request.requested | An employee submits a new absence request |
absence_request.approved | A manager approves an absence request, or the request is auto-approved |
absence_request.rejected | A manager rejects an absence request |
absence_request.cancelled | An employee cancels their absence request |
absence_request.deleted | An absence request is permanently removed |
absence_request.updated | Any field on an existing absence request is changed (e.g. dates, substitute, or notes) |
Setting up webhooks
Open Webhook settings
Go to Settings > Webhooks in your Spock Dashboard. You can also navigate there directly at Open Webhooks in Dashboard.
Enable webhook delivery
Toggle Webhook status to Active. You can disable it at any time without losing your configuration.
Enter your webhook URL
In the Webhook URL field, enter the HTTPS endpoint where Spock should send POST requests. For example:
Copy the signing secret
Spock auto-generates a Signing secret (
whsec_...) for your endpoint. Copy it using the clipboard button next to the secret field and store it securely — you will need it to verify that incoming payloads are genuinely from Spock.You can click the eye icon to reveal the full secret, or click Regenerate secret to create a new one.Select events
Under Subscribed events, check the events you want to receive. Use Select All or Deselect All for convenience, or pick specific events.

Testing your webhook
Before relying on webhooks in production, verify that your endpoint receives and processes events correctly.Send a test event
Configure your endpoint
Make sure you have saved a valid Webhook URL and the webhook status is Active.
Click Send Test
Click the Send Test button next to the Webhook URL field. Spock sends a test event (
absence_request.test) to your endpoint.Checking the delivery log
The Recent deliveries section at the bottom of the Webhooks settings page shows the 20 most recent delivery attempts. Each entry displays:| Column | Description |
|---|---|
| Event | The event type (e.g., absence_request.approved, absence_request.test) |
| Timestamp | When the delivery was attempted |
| Status | HTTP status badge — green for success (200), red for failure (404, 500, etc.) |
| Response | HTTP status code and response time in milliseconds |
| Actions | View the payload (</> button) or retry a failed delivery (retry button) |
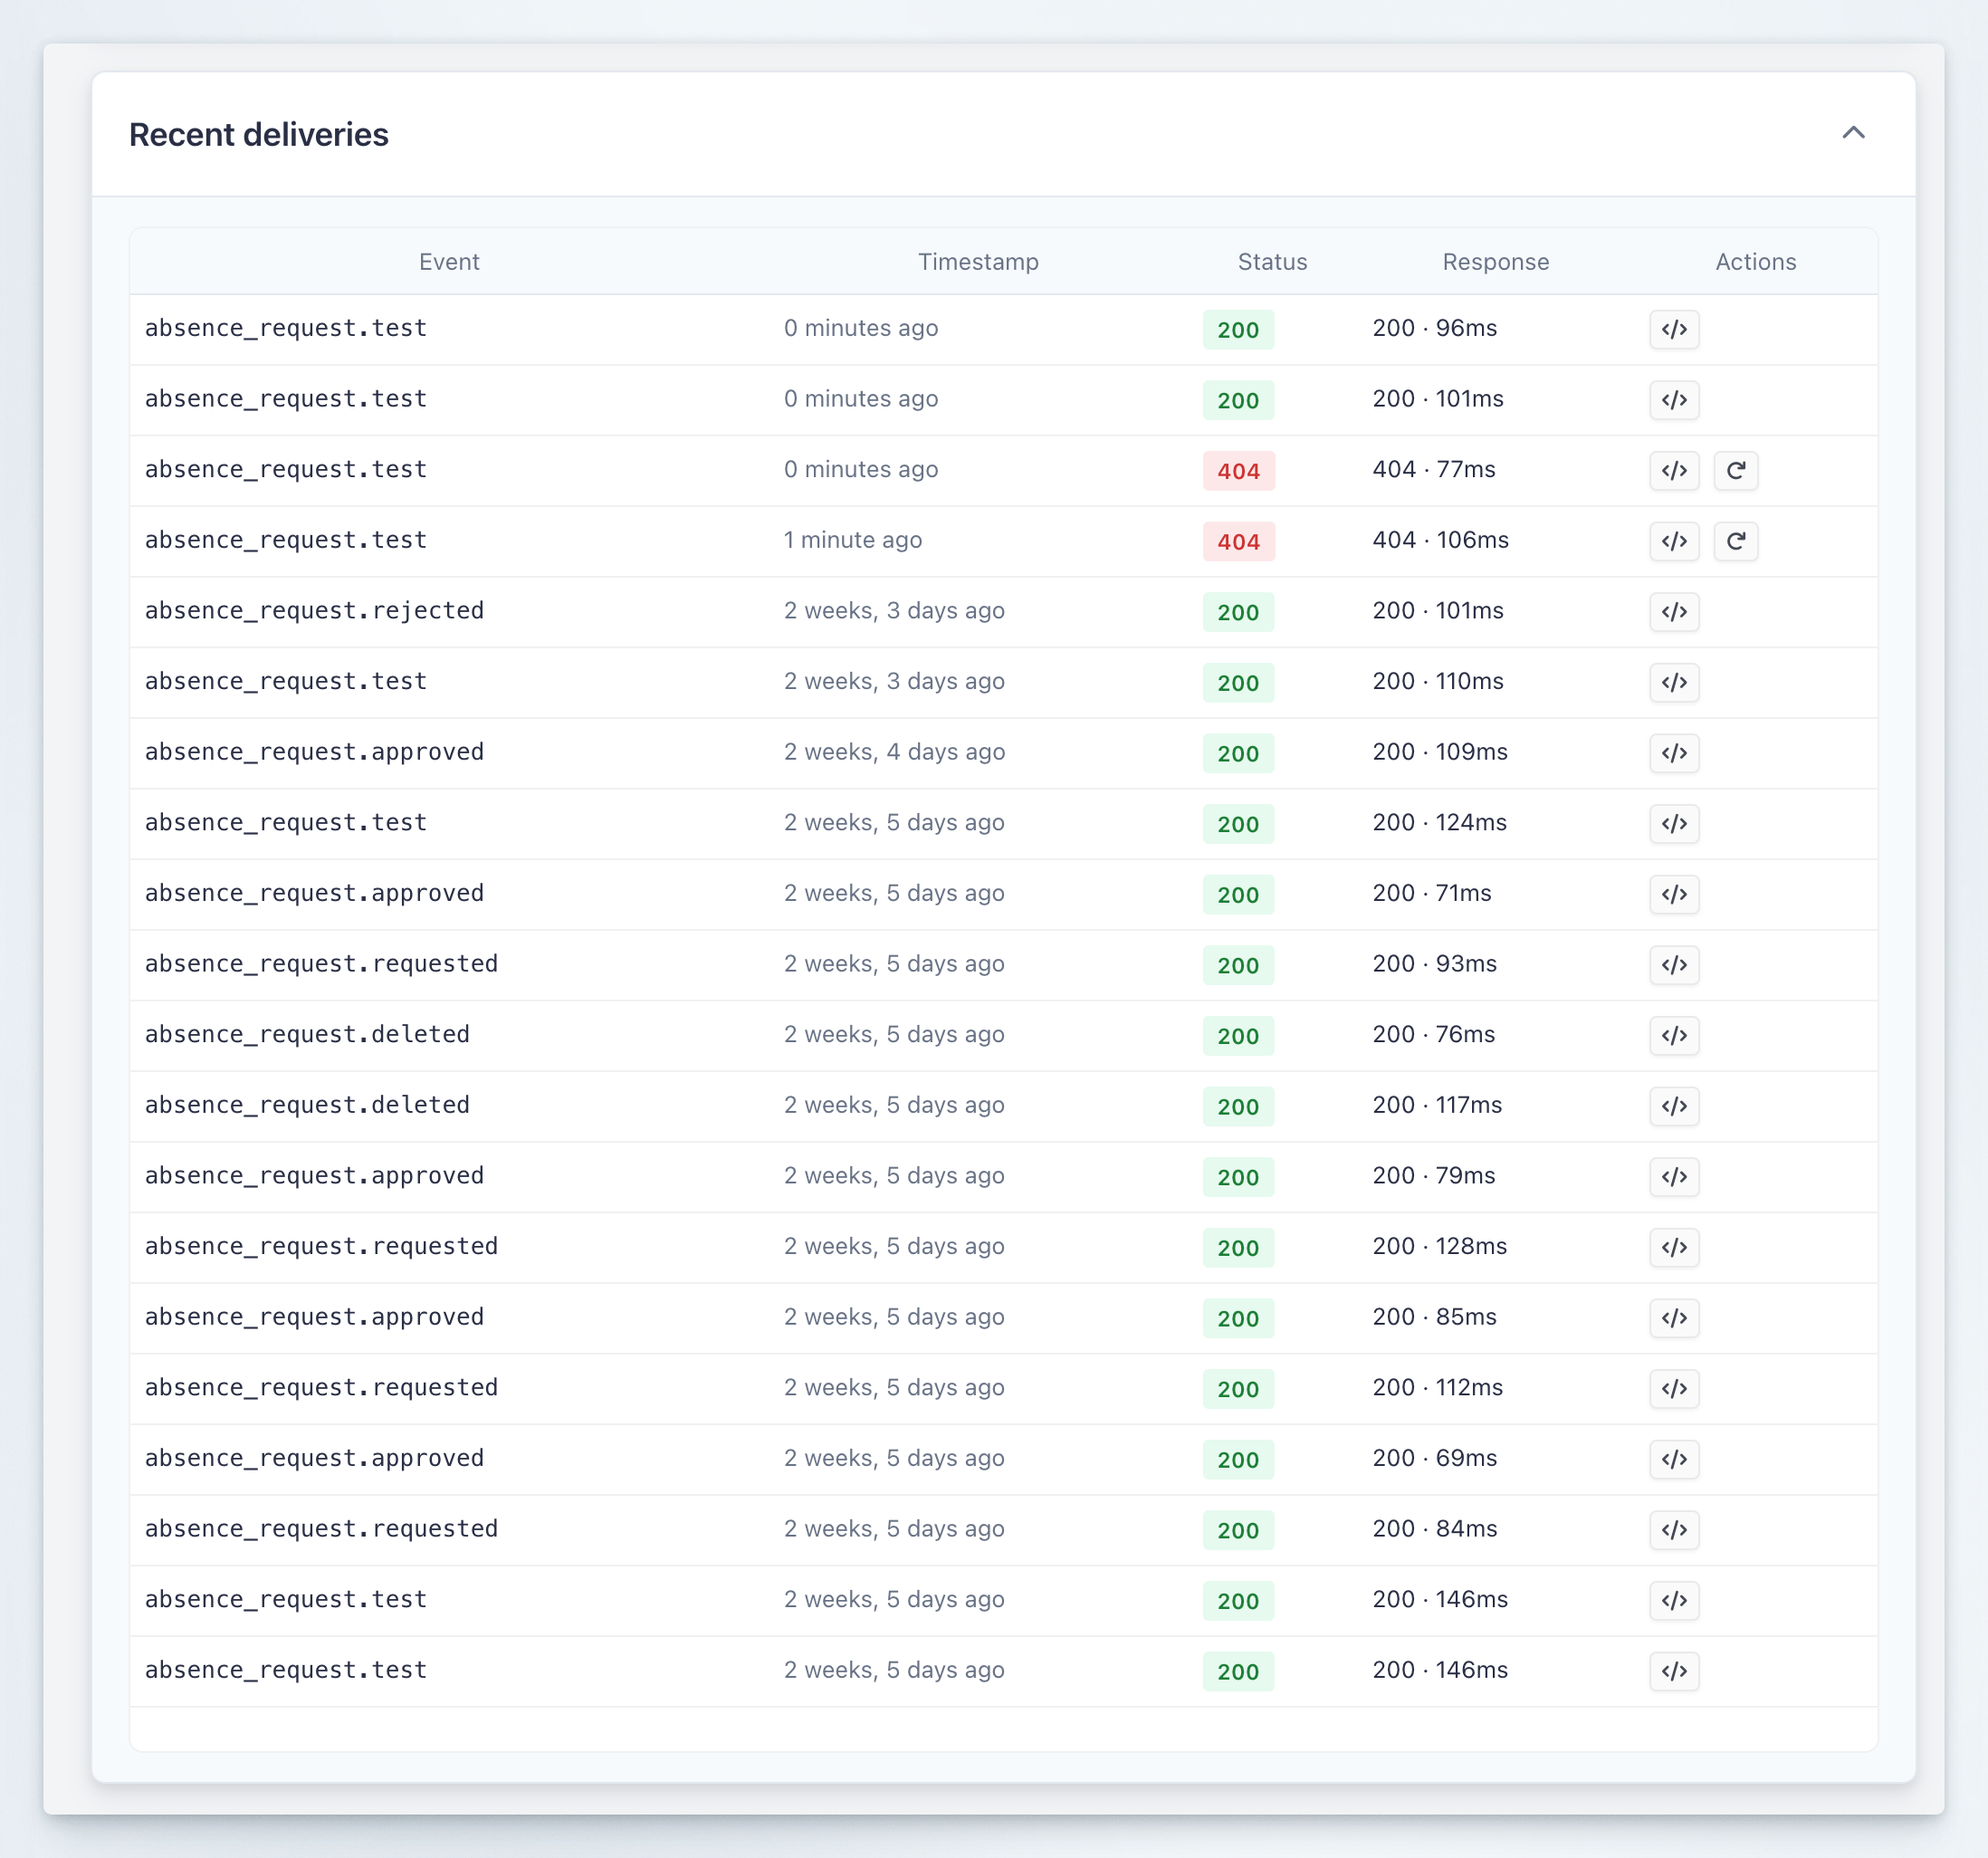
- Confirm events are reaching your endpoint
- Debug failed deliveries by inspecting the response code and payload
- Retry failed deliveries with the retry button (available on non-200 responses)
Verifying webhook signatures
Every webhook delivery includes anX-Spock-Signature header so you can verify the payload was sent by Spock and wasn’t tampered with. The signature uses HMAC-SHA256 with your endpoint’s signing secret.
The header looks like this:
- Parse the
t(timestamp) andv1(signature) values from the header - Construct the signed string:
{timestamp}.{raw_json_body} - Compute HMAC-SHA256 using your signing secret as the key
- Compare your computed signature with
v1using a constant-time comparison - Optionally reject payloads older than 5 minutes to prevent replay attacks
Payload format
All events are delivered as JSON POST requests. Here is an example payload for anabsence_request.approved event:
Payload field reference
Payload field reference
| Field | Type | Description |
|---|---|---|
event | string | Event type (e.g., absence_request.approved) |
timestamp | datetime | UTC timestamp of when the event was generated |
data.id | int | Leave request ID |
data.status | string | Human-readable status: requested, approved, rejected, cancelled, deleted |
data.status_code | int | Numeric status code (0=Requested, 2=Approved, 4=Rejected, 8=Deleted, 10=Cancelled) |
data.leave_type | string | Leave type name |
data.start_date | date | Leave start date (YYYY-MM-DD) |
data.end_date | date | Leave end date (YYYY-MM-DD) |
data.duration_days | decimal | Duration in working days |
data.is_hourly | boolean | Whether the request uses hourly tracking |
data.start_hour | string/null | Start hour (HH:MM) for hourly requests |
data.end_hour | string/null | End hour (HH:MM) for hourly requests |
data.duration_hours | decimal/null | Duration in hours (hourly requests only) |
data.notes | string | Request notes visible to the team |
data.requestor | object | {slack_user_id, name, email} — the employee requesting leave |
data.acted_by | object/null | {slack_user_id, name, email} — the person who triggered this event (null for auto-approval) |
data.substitute | object/null | {slack_user_id, name} — assigned substitute, if any |
data.team | object | {slack_team_id, name} — the Slack workspace |
data.approved_time | datetime/null | When the request was approved |
data.rejected_time | datetime/null | When the request was rejected |
data.canceled_time | datetime/null | When the request was cancelled |
data.deleted_time | datetime/null | When the request was deleted |
data.created_time | datetime | When the request was originally created |
Who is acted_by for each event?
Who is acted_by for each event?
| Event | acted_by value |
|---|---|
absence_request.requested | The requestor (or manager if created on behalf) |
absence_request.approved | The approver; null if auto-approved |
absence_request.rejected | The rejecting approver |
absence_request.cancelled | The person who cancelled (employee or admin) |
absence_request.deleted | The person who deleted the request |
absence_request.updated | The person who modified dates/hours |
The updated event includes a changes field
The updated event includes a changes field
The
absence_request.updated event includes a changes object showing what was modified:Delivery and retry policy
| Property | Value |
|---|---|
| HTTP method | POST |
| Content-Type | application/json |
| Timeout | 10 seconds |
| Max retries | 3 |
| Retry intervals | 60s, 300s, 900s (exponential backoff) |
| Expected response | Any 2xx status code |
- Deliveries are asynchronous and do not block the leave approval flow
- Any non-2xx response or timeout triggers a retry
- After 3 failed retries, the delivery is marked as failed in the delivery log
Best practices
Respond quickly
Return a200 response as soon as you receive the payload. Process the data asynchronously in your own system to avoid timeouts. Spock waits a maximum of 10 seconds before marking a delivery as failed.
Verify signatures
Always validate theX-Spock-Signature header before processing payloads. This ensures requests are genuinely from Spock and prevents spoofed events from triggering actions in your system.
Handle duplicates
Design your integration to be idempotent. In rare cases (e.g., network retries), you may receive the same event more than once. Use the combination ofdata.id and event to detect duplicates.
Monitor the delivery log
Check the Recent deliveries section regularly to spot failures early. A pattern of404 or 500 responses usually indicates a misconfigured endpoint URL or a bug in your handler.
Use event filtering
Subscribe only to the events your integration needs. Fewer events mean less processing and fewer opportunities for errors.Keep your signing secret safe
Treat the signing secret like a password. Store it in environment variables or a secret manager — not in source code. If you suspect it has been exposed, use Regenerate secret immediately.Related topics
Integration Settings
Configure organization-wide integration settings for Slack and external calendars.
Team Notifications
Set up Slack channel notifications for team leave activity.
Channel Notifications
Configure organization-wide Slack notifications for leave events.
Leave Types
Manage the leave types that trigger webhook events.