This page is for administrators only. These settings affect your entire organization and require admin privileges to modify.
In this article
- How to Access Integration Settings
- Slack Users Import Settings
- External Calendar Integration
- Saving Your Settings
How to Access Integration Settings
1
Sign in to Spock Dashboard
Sign in to your Spock Dashboard with administrator credentials
2
Go to Settings
Navigate to Settings > Integrations
3
Configure Settings
Adjust integration settings according to your organization’s needs
4
Save Changes
Click Save Changes to apply your settings
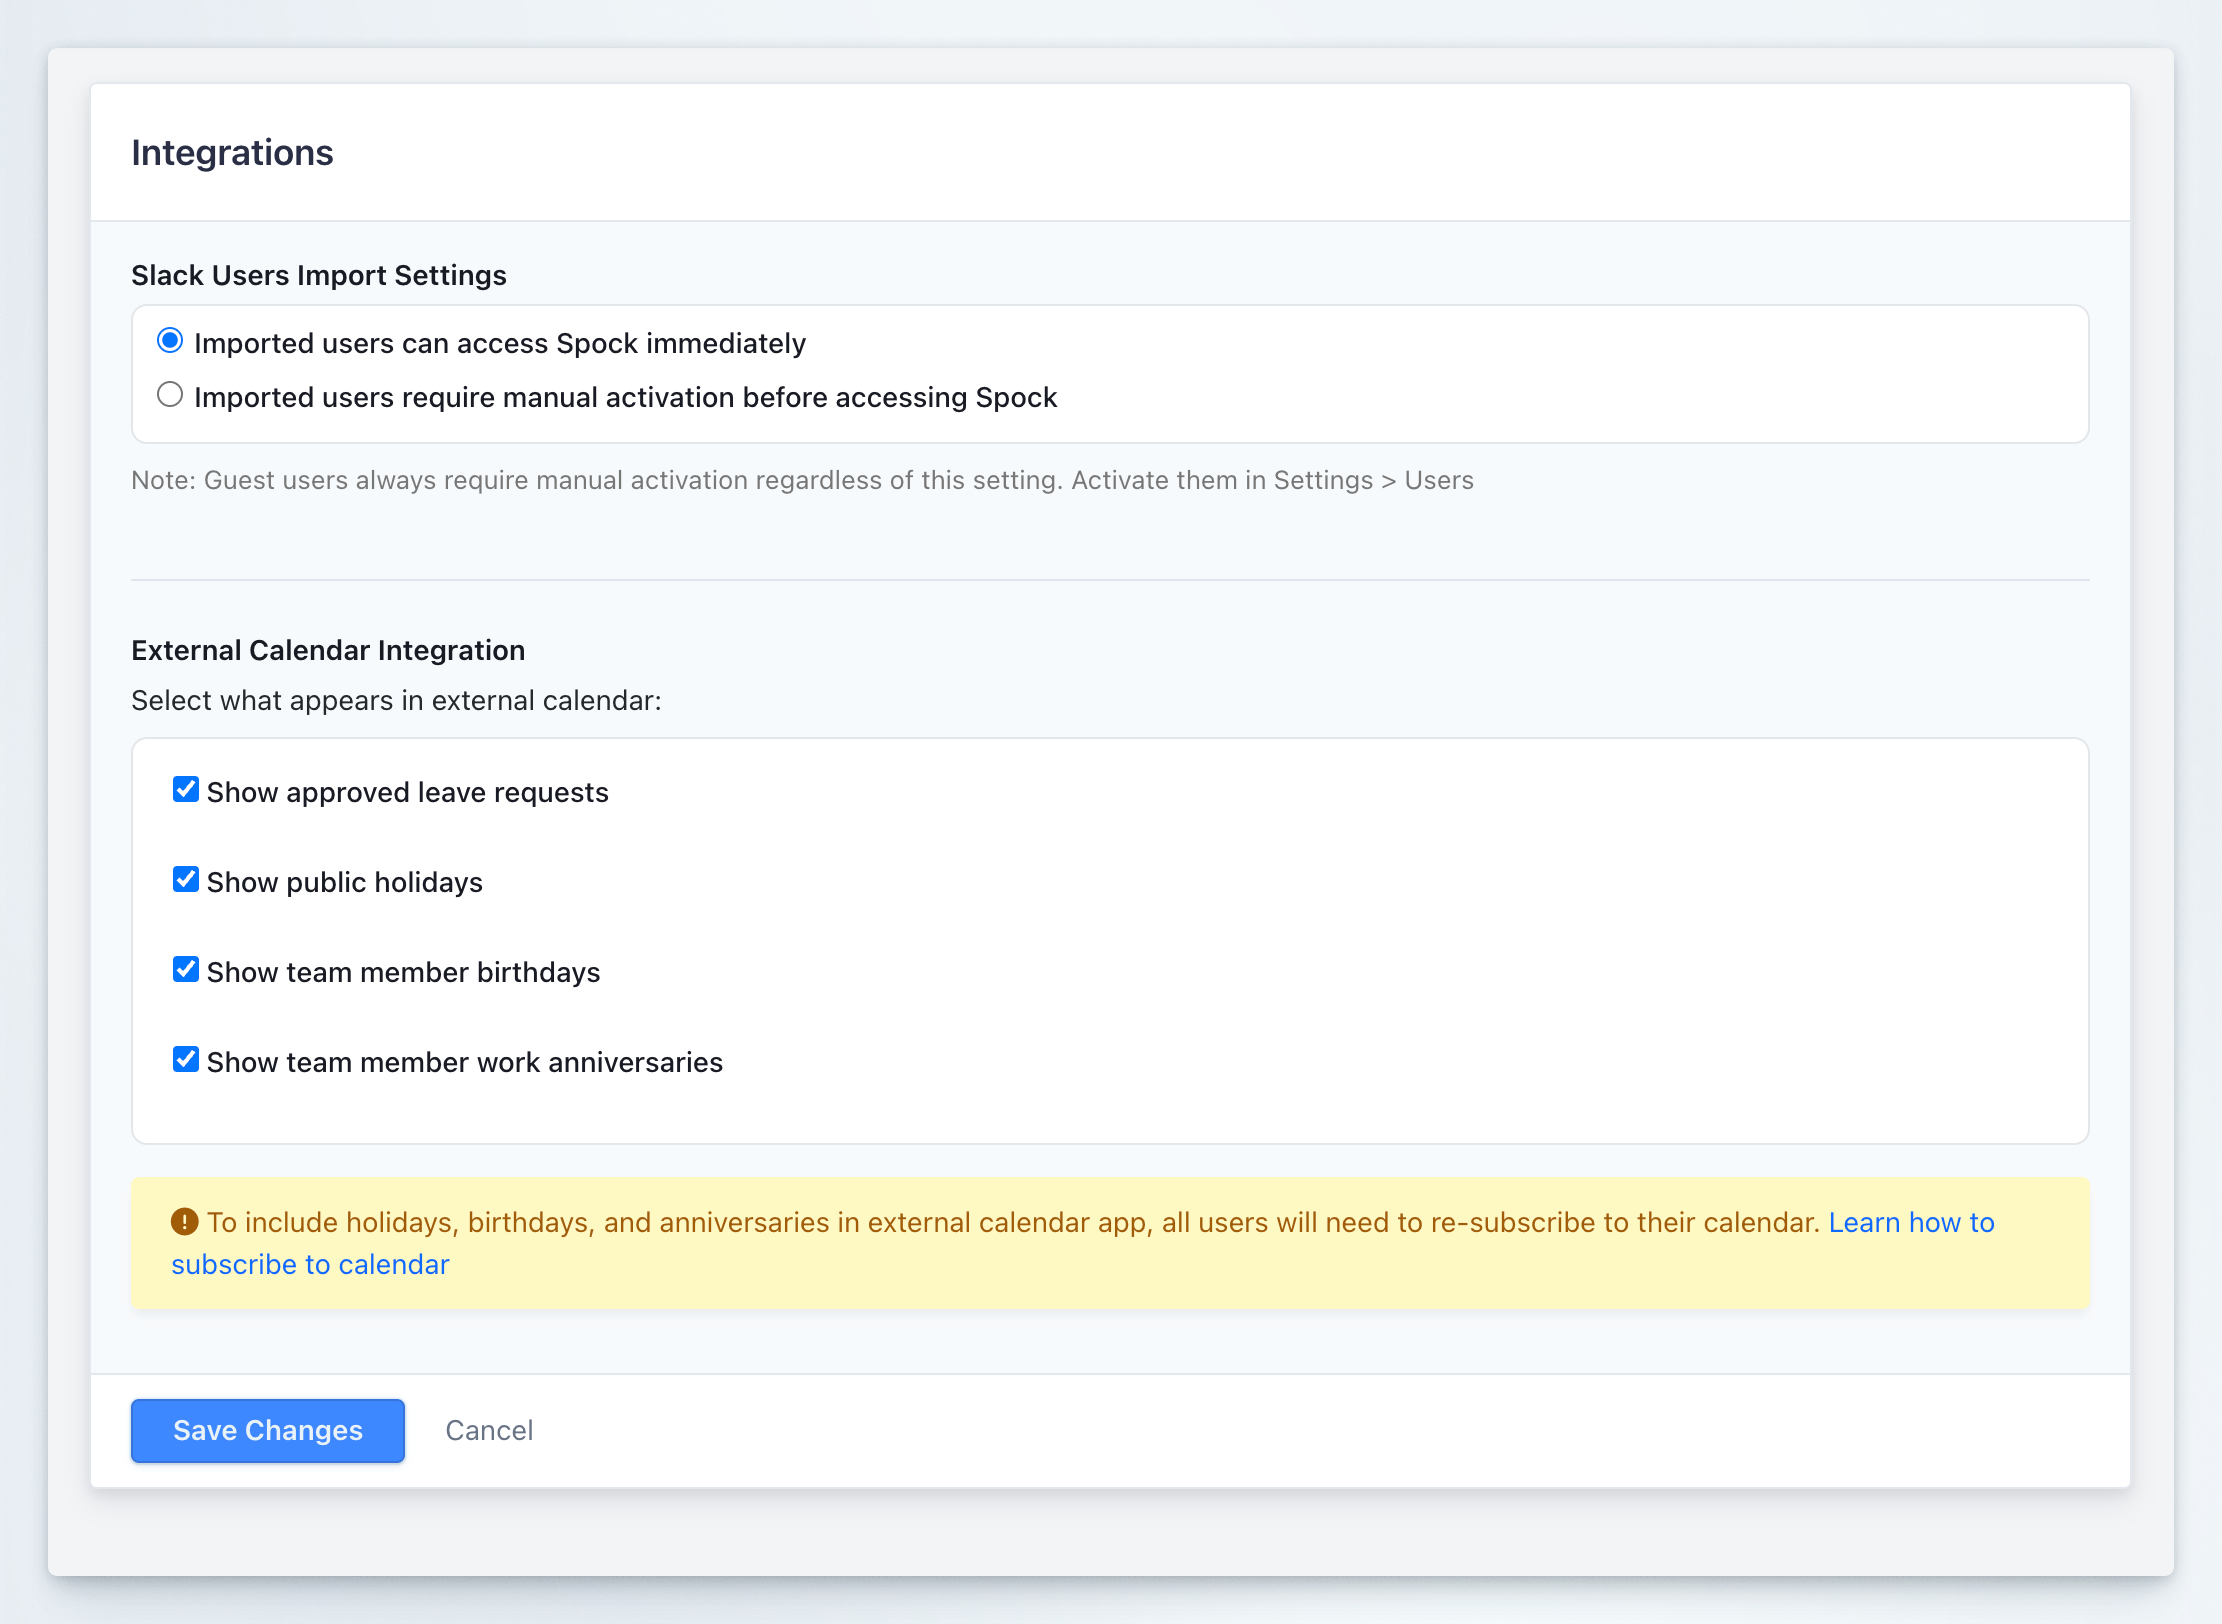
Slack Users Import Settings
Control how imported Slack users access Spock
When you import users from Slack to Spock, you can control whether they can access the system immediately or require manual activation first. This setting helps you manage user onboarding and maintain control over workspace access. Setting: Slack Users Import Settings Default: Imported users can access Spock immediatelyConfiguration Options
You can choose between two options:Imported users can access Spock immediately
Imported users can access Spock immediately
When this option is selected:
- Users imported from Slack are automatically activated in Spock
- They can start using Spock right away without administrator intervention
- They receive access to all features according to their role
- No manual activation step is required
- You want to streamline user onboarding
- You trust all Slack workspace members to access Spock
- You want to minimize administrative overhead
- Your organization has a small to medium-sized team
Imported users require manual activation before accessing Spock
Imported users require manual activation before accessing Spock
When this option is selected:
- Users imported from Slack are created but remain inactive
- They cannot access Spock until an administrator manually activates them
- Administrators must activate each user individually in Settings > Users
- This provides tighter control over workspace access
- You want to control exactly who has access to Spock
- You need to review user permissions before granting access
- You have compliance or security requirements for user activation
- You want to onboard users in phases or groups
How to Select Import Behavior
1
Locate Setting
Find the Slack Users Import Settings section at the top of the Integrations page
2
Choose Option
Select one of the radio button options:
- Imported users can access Spock immediately (recommended for most organizations)
- Imported users require manual activation before accessing Spock (for controlled onboarding)
3
Save Changes
Click Save Changes at the bottom of the page to apply your selection
Guest User Activation
Guest users in your Slack workspace are handled differently from regular members:- Guest users are never automatically activated, even if you select “Imported users can access Spock immediately”
- Administrators must always manually activate guest users in the Users section
- This provides additional security control for external or limited-access users
- Navigate to Settings > Users
- Find the guest user in the user list
- Click to activate their account
- Configure their permissions and access level
External Calendar Integration
Select what appears in external calendar
Control what information from Spock appears in external calendar applications when users subscribe to Spock calendars. This setting determines the types of events that are included in the iCal feed for Google Calendar, Apple Calendar, Microsoft Outlook, and other calendar applications. Setting: External Calendar Integration Default: All options enabled (all content types visible)Content Options
You can choose to include or exclude the following types of information in external calendars:Show approved leave requests
Show approved leave requests
Checkbox: Show approved leave requestsWhen enabled:
- All approved leave requests appear in external calendars
- Users can see when team members are on leave
- Leave events include relevant details like leave type and duration
- Only approved requests are shown (pending or rejected requests are excluded)
- Leave requests are hidden from external calendars
- Users must check the Spock Dashboard to see leave information
- Calendar integration focuses only on other event types
Show public holidays
Show public holidays
Checkbox: Show public holidaysWhen enabled:
- Public holidays configured in Spock appear in external calendars
- Users can see official non-working days in their calendar app
- Holiday events are clearly marked and visible across all platforms
- Holidays reflect the holiday calendar assigned to each user
- Public holidays are hidden from external calendars
- Users must reference other sources for holiday information
- Calendar only shows leave requests and other selected event types
Show team member birthdays
Show team member birthdays
Checkbox: Show team member birthdaysWhen enabled:
- Team member birthdays appear in external calendars
- Users receive reminders about upcoming birthdays
- Helps promote team culture and recognition
- Birthday information must be added to user profiles in Spock
- Birthdays are hidden from external calendars
- Users won’t see birthday reminders in their calendar app
- Birthday information remains private
Show team member work anniversaries
Show team member work anniversaries
Checkbox: Show team member work anniversariesWhen enabled:
- Work anniversaries appear in external calendars
- Users receive reminders about team members’ milestone dates
- Helps recognize employee tenure and loyalty
- Anniversary dates must be configured in user profiles
- Work anniversaries are hidden from external calendars
- Users won’t see anniversary reminders in their calendar app
- Anniversary information remains private
How to Configure Calendar Content
1
Locate Setting
Find the External Calendar Integration section on the Integrations page
2
Review Options
Review the four checkbox options:
- Show approved leave requests
- Show public holidays
- Show team member birthdays
- Show team member work anniversaries
3
Select Content
Check or uncheck each option based on what you want to include in external calendars
4
Save Changes
Click Save Changes at the bottom of the page
5
Notify Users
After saving, inform users that they may need to re-subscribe to their calendars (see warning below)
Re-subscription Requirement
When you change the external calendar integration settings:- Users who have already subscribed to Spock calendars may not see the changes immediately
- Calendar applications cache iCal feeds and may not refresh automatically
- Users should unsubscribe and re-subscribe to their Spock calendars to see updated content
How Users Should Re-subscribe
Direct users to follow these steps:1
Unsubscribe from Current Calendar
In their calendar application (Google Calendar, Apple Calendar, etc.), users should remove the existing Spock calendar subscription
2
Access Spock Dashboard
Users should sign in to the Spock Dashboard
3
Navigate to Calendar
Click the Calendar tab in Spock
4
Subscribe Again
Click Subscribe Company Calendar or Subscribe Team Calendar to add the calendar again with updated settings
5
Verify Content
Users should verify that the new content types (holidays, birthdays, anniversaries) now appear in their calendar
Saving Your Settings
After adjusting any integration settings, you must save your changes:- Review your selections for both Slack Users Import and External Calendar Integration
- Click the blue Save Changes button at the bottom of the form
- Alternatively, click Cancel to discard any changes and revert to previous settings
- Slack import behavior applies to all future user imports
- External calendar content changes require users to re-subscribe to their calendars
Use Cases and Best Practices
Recommended Settings for Most Organizations
For standard organizations:- Slack Users Import: Imported users can access Spock immediately (streamlined onboarding)
- External Calendar - Approved leave requests: Enabled (essential for team coordination)
- External Calendar - Public holidays: Enabled (helps with planning)
- External Calendar - Birthdays: Enabled (promotes team culture)
- External Calendar - Work anniversaries: Enabled (celebrates milestones)
Recommended Settings for Security-Conscious Organizations
For organizations with strict access controls:- Slack Users Import: Imported users require manual activation (controlled access)
- External Calendar - Approved leave requests: Enabled (essential for team coordination)
- External Calendar - Public holidays: Enabled (helps with planning)
- External Calendar - Birthdays: Disabled if privacy is a concern
- External Calendar - Work anniversaries: Disabled if privacy is a concern
When to Require Manual Activation
Choose manual activation for imported Slack users if:- Your organization has compliance requirements for system access
- You want to verify user roles before granting access
- You’re onboarding a large number of users and want to control the rollout
- You have a mix of full-time employees, contractors, and consultants with different access needs
- You need time to configure individual user permissions before they access Spock
When to Show All Calendar Content
Enable all external calendar content options if:- Your organization values team culture and recognition
- You want to maximize calendar integration benefits
- Privacy concerns about birthdays and anniversaries are minimal
- Your team actively uses external calendars for planning and coordination
When to Limit Calendar Content
Disable some external calendar content options if:- Your organization has privacy policies restricting personal information sharing
- You want to keep external calendars focused only on leave and holidays
- Your team doesn’t celebrate birthdays or anniversaries organizationally
- You want to minimize calendar clutter
Integration settings are organization-wide and affect all users. Consider surveying your team or consulting with stakeholders before making significant changes.
Related Topics
Calendar Integration Setup
Learn how users can subscribe to Spock calendars in their calendar applications.
User Administration
Manage user accounts and manually activate imported Slack users.
Birthdays & Anniversaries
Configure birthday and work anniversary tracking for your organization.
Holidays
Set up public holiday calendars that appear in external calendar apps.