Creating a New Team
1
Access the Dashboard
Sign in to the Spock Dashboard.
2
Navigate to Teams
Click the Members tab in the top navigation.
3
Add new team
Click + Add Team in the left sidebar under the Organization section.
4
Enter team details
Fill in the team details: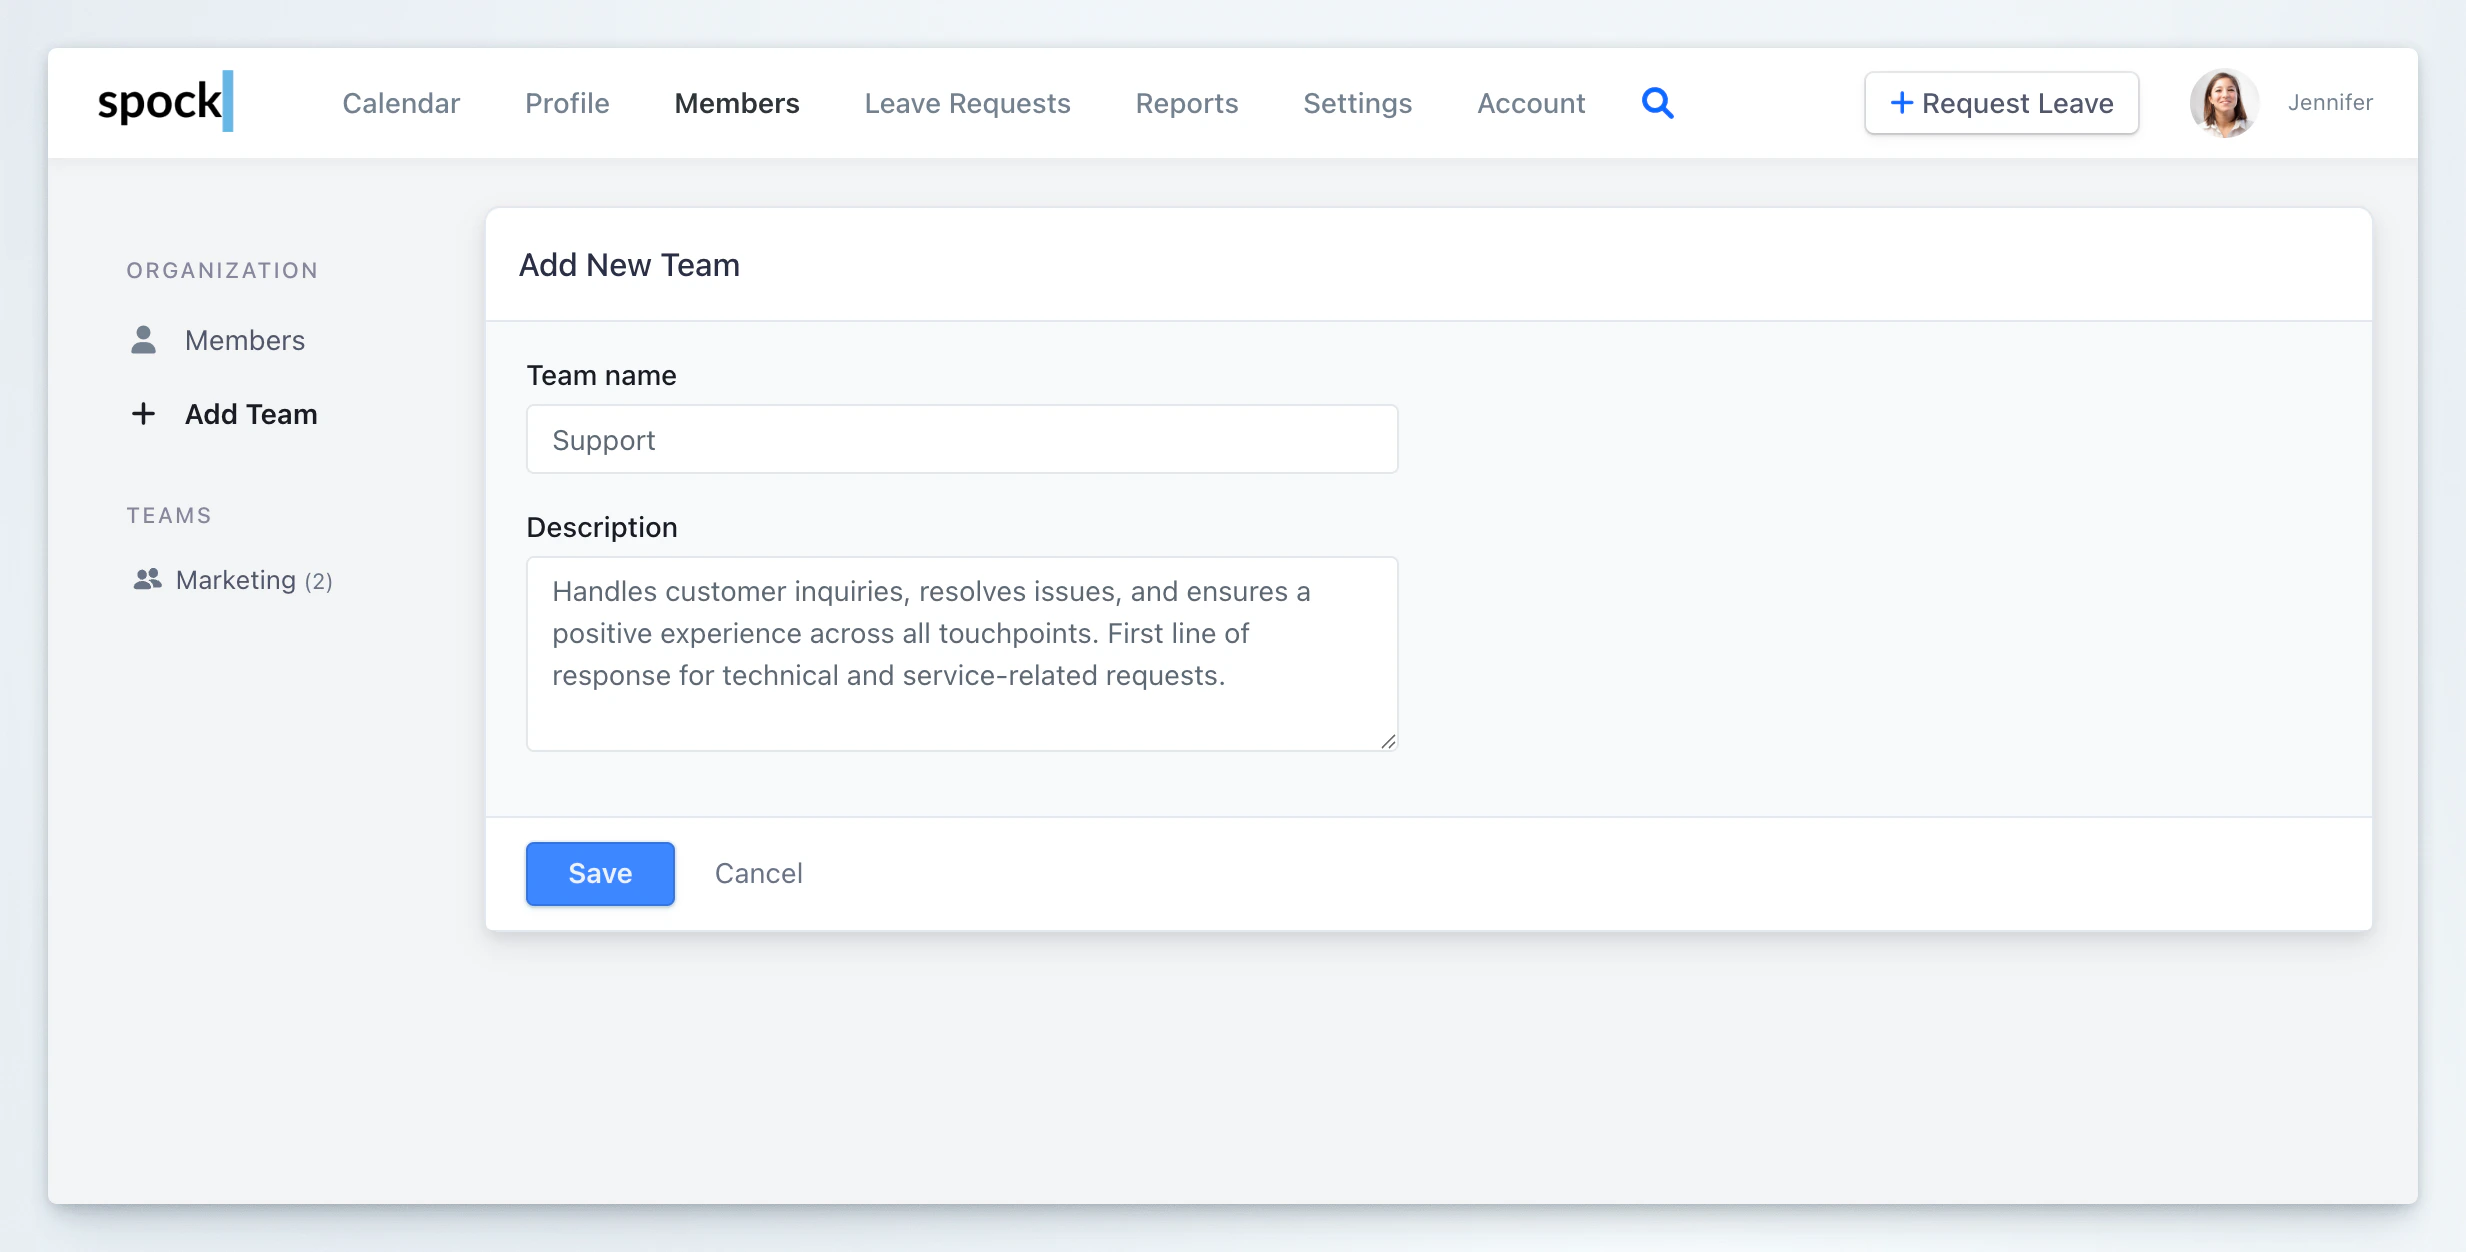
- Team name — a descriptive name for the team
- Description — an optional summary of the team’s purpose and responsibilities
5
Save the team
Click Save to create the new team, or Cancel to discard.
Managing Team Members
The Team Members tab displays the current team composition, divided into Team Managers and Members sections.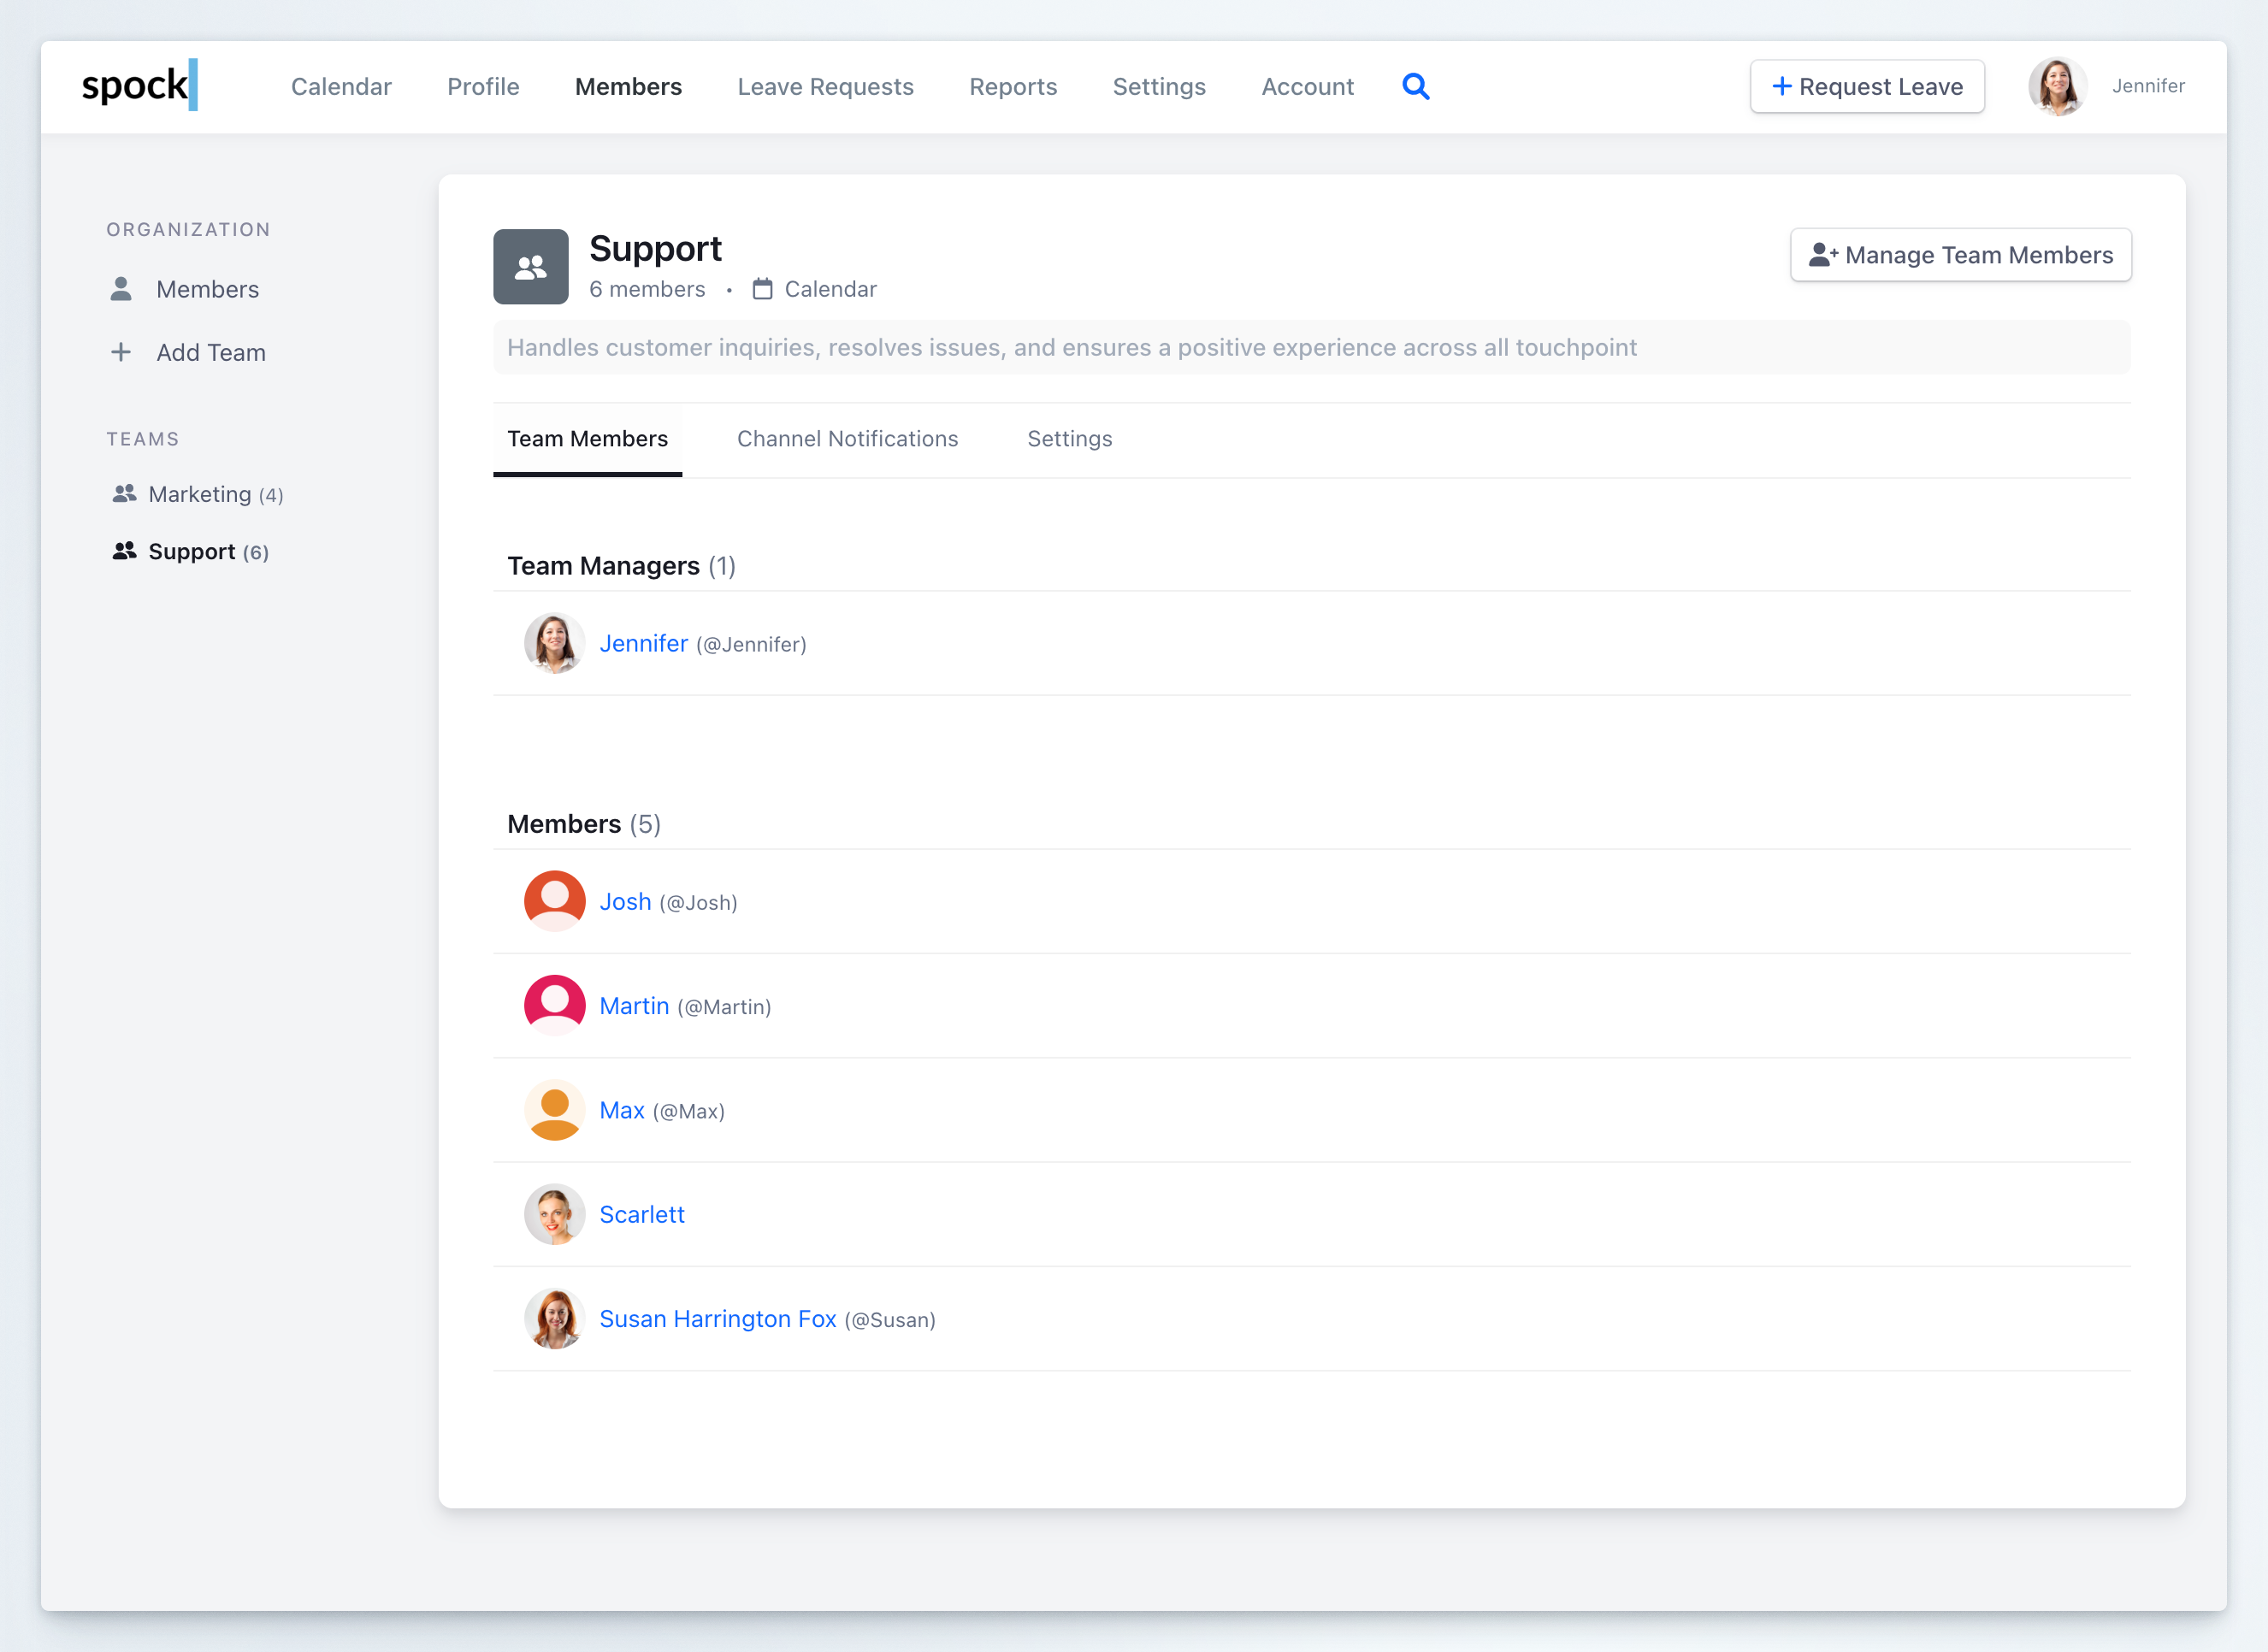
Adding or removing members
1
Open the team
Navigate to Members in the top navigation, then select the team you want to manage from the left sidebar.
2
Open the membership dialog
Click the Manage Team Members button in the top-right corner of the team detail view.
3
Update team composition
Use the two dropdown selectors to manage the team: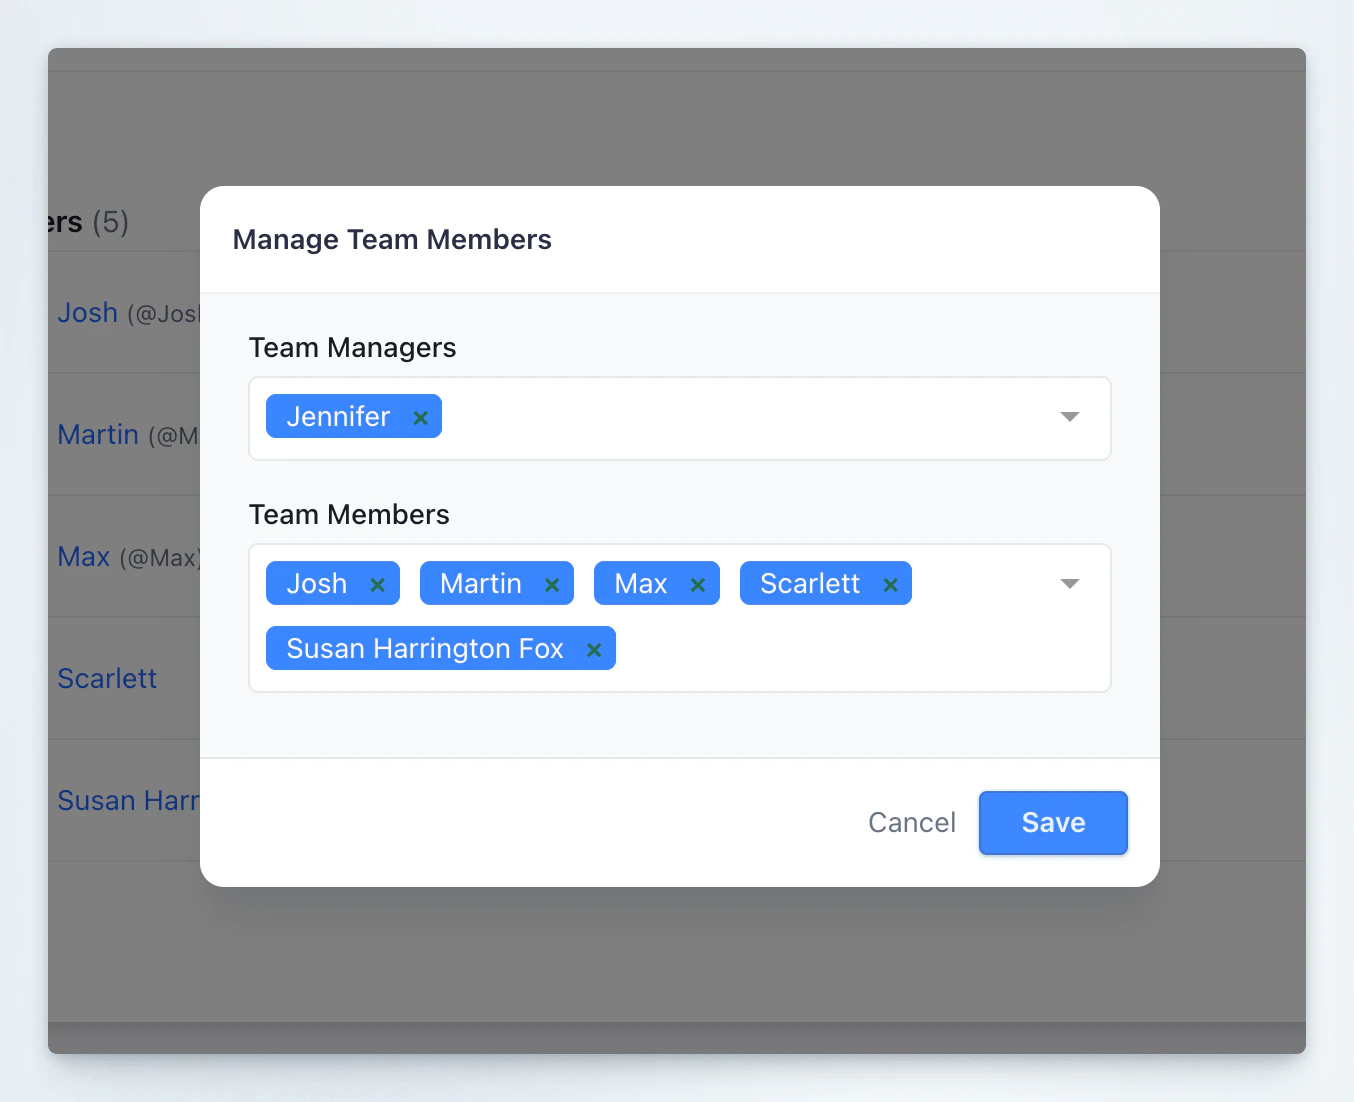
- Team Managers — select or remove users who can approve leave requests and manage the team
- Team Members — select or remove regular team members
4
Save changes
Click Save to apply the changes, or Cancel to discard.
Managing Team Settings
The Settings tab lets you update the team’s basic configuration.1
Open team settings
Select the team from the left sidebar, then click the Settings tab.
2
Update team details
Edit the following fields: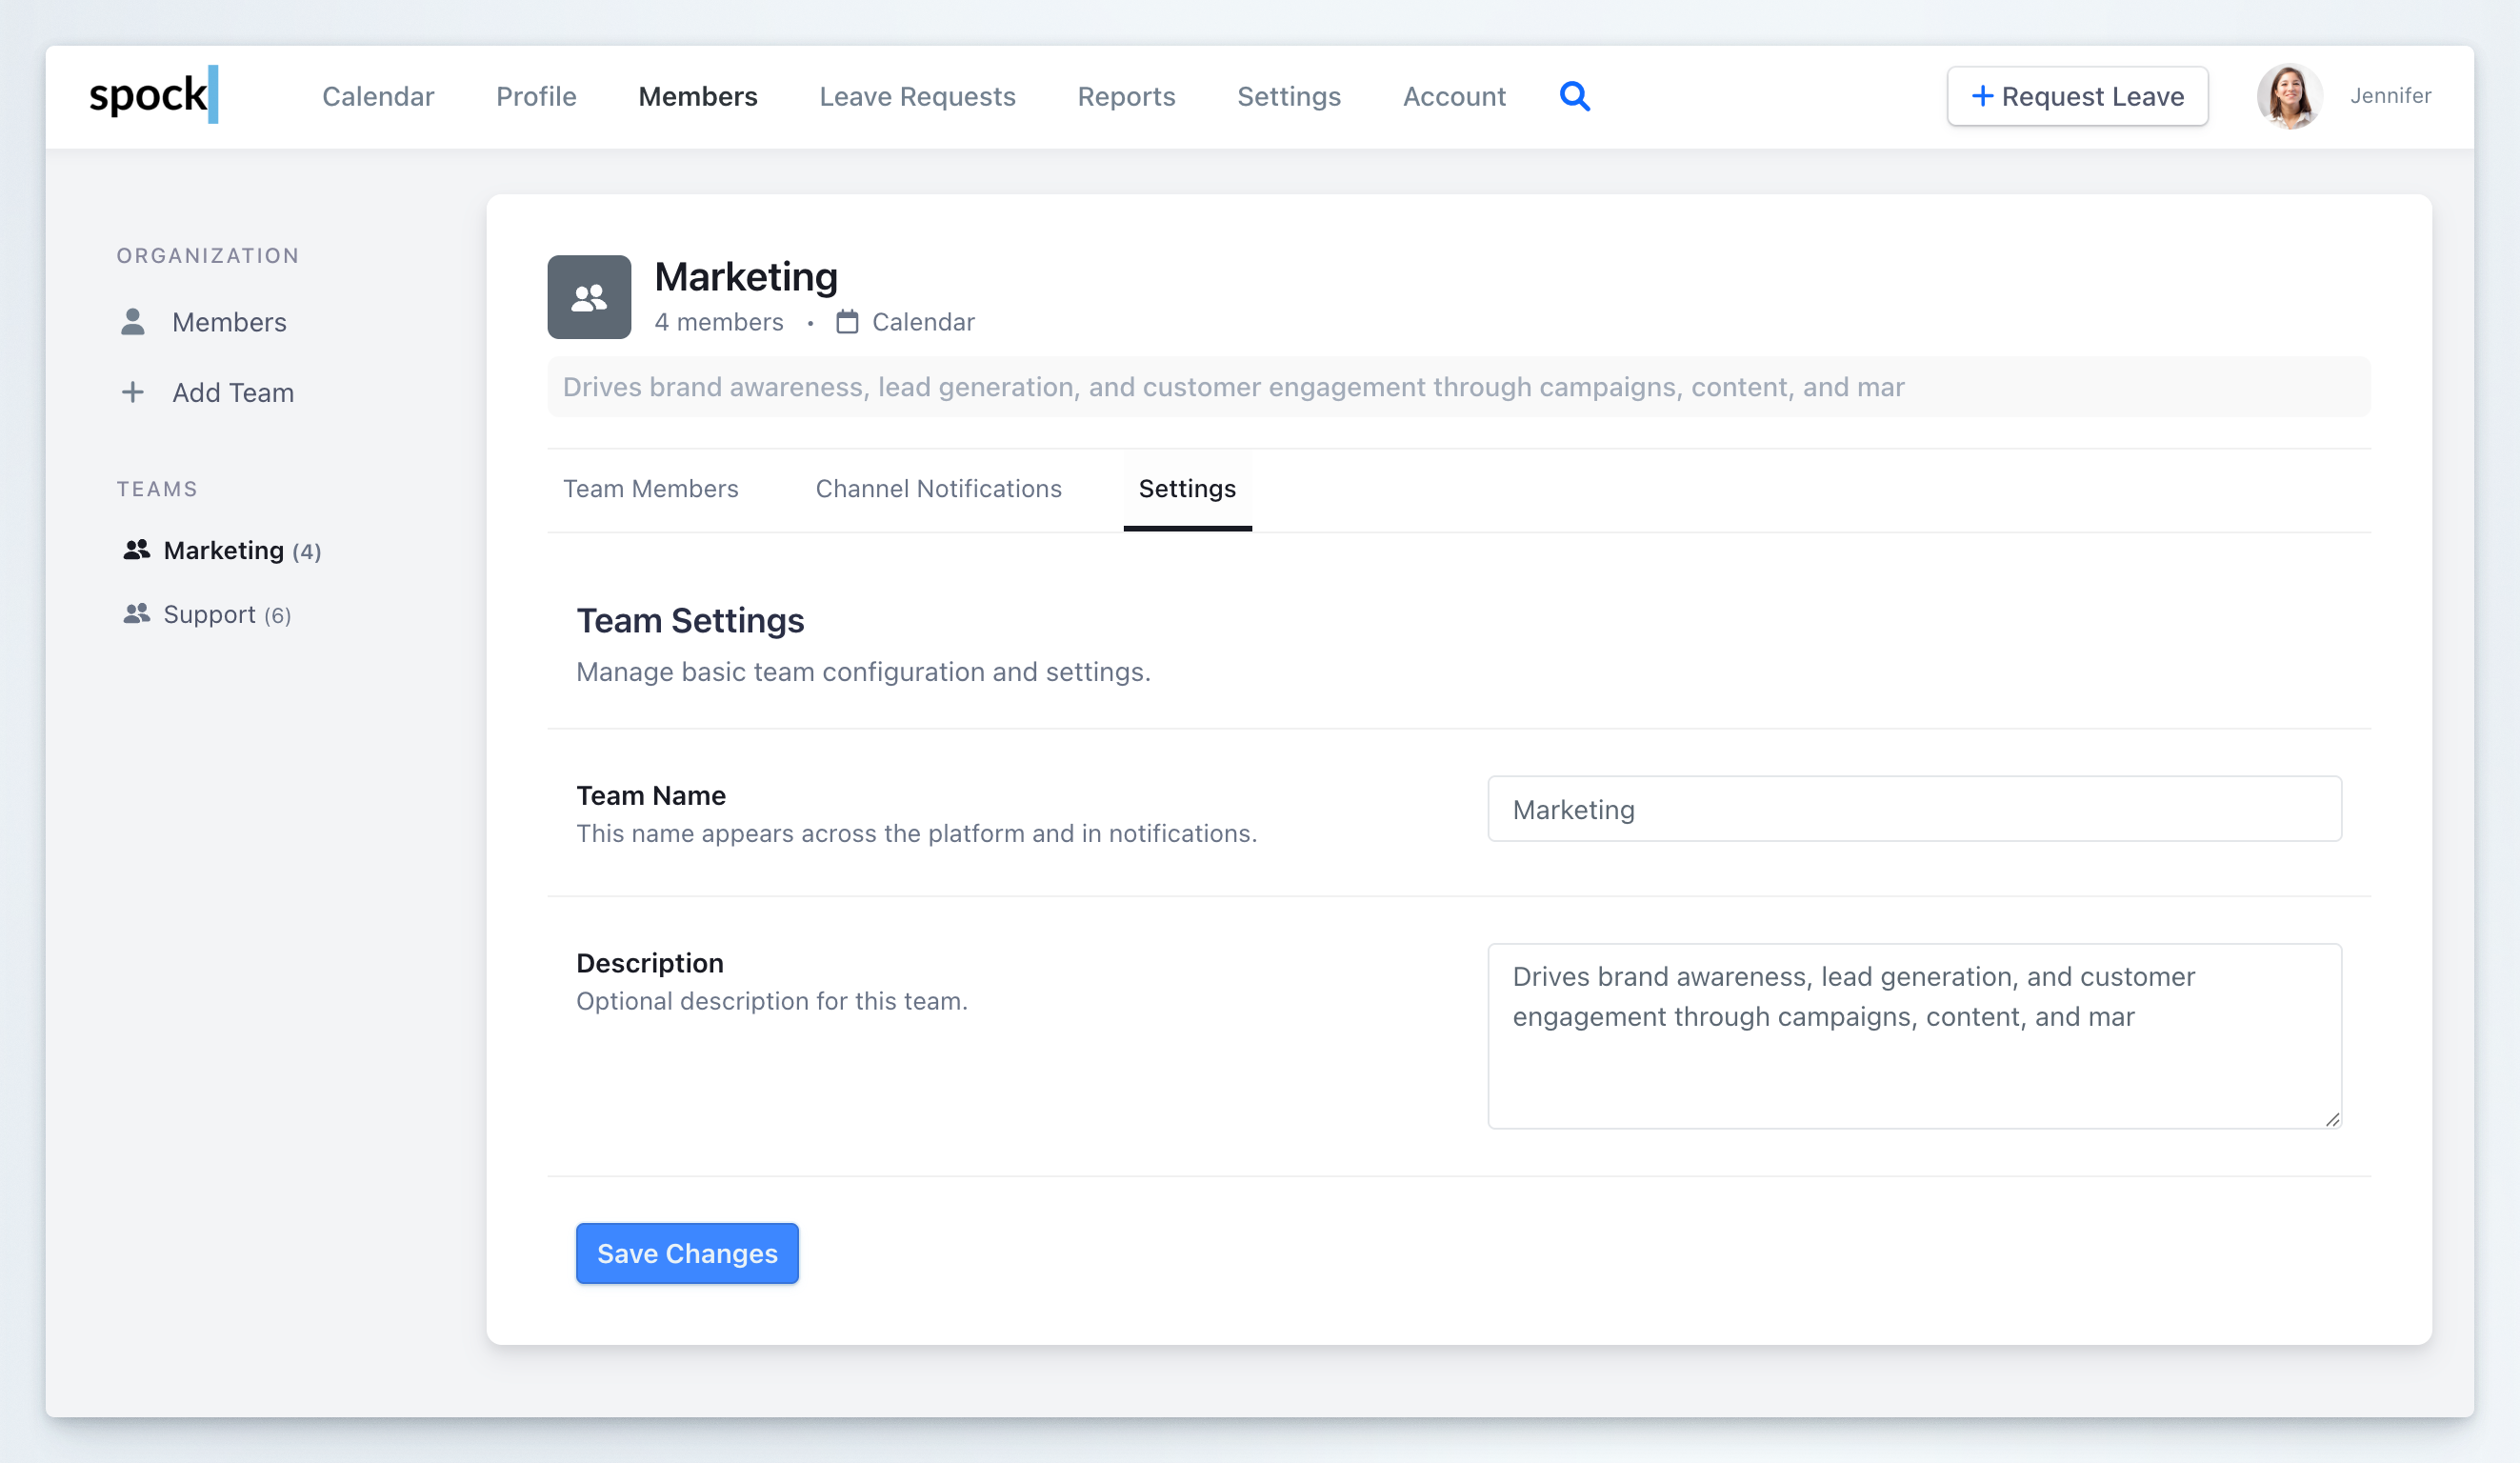
- Team Name — the name that appears across the platform and in notifications
- Description — an optional description of the team’s purpose
3
Save changes
Click Save Changes to apply your updates.
Deleting a Team
1
Open team settings
Select the team from the left sidebar, then click the Settings tab.
2
Initiate deletion
Click the Delete team link in the bottom-right corner of the settings page.
3
Confirm deletion
A confirmation section appears. Check the Yes, delete team checkbox to confirm.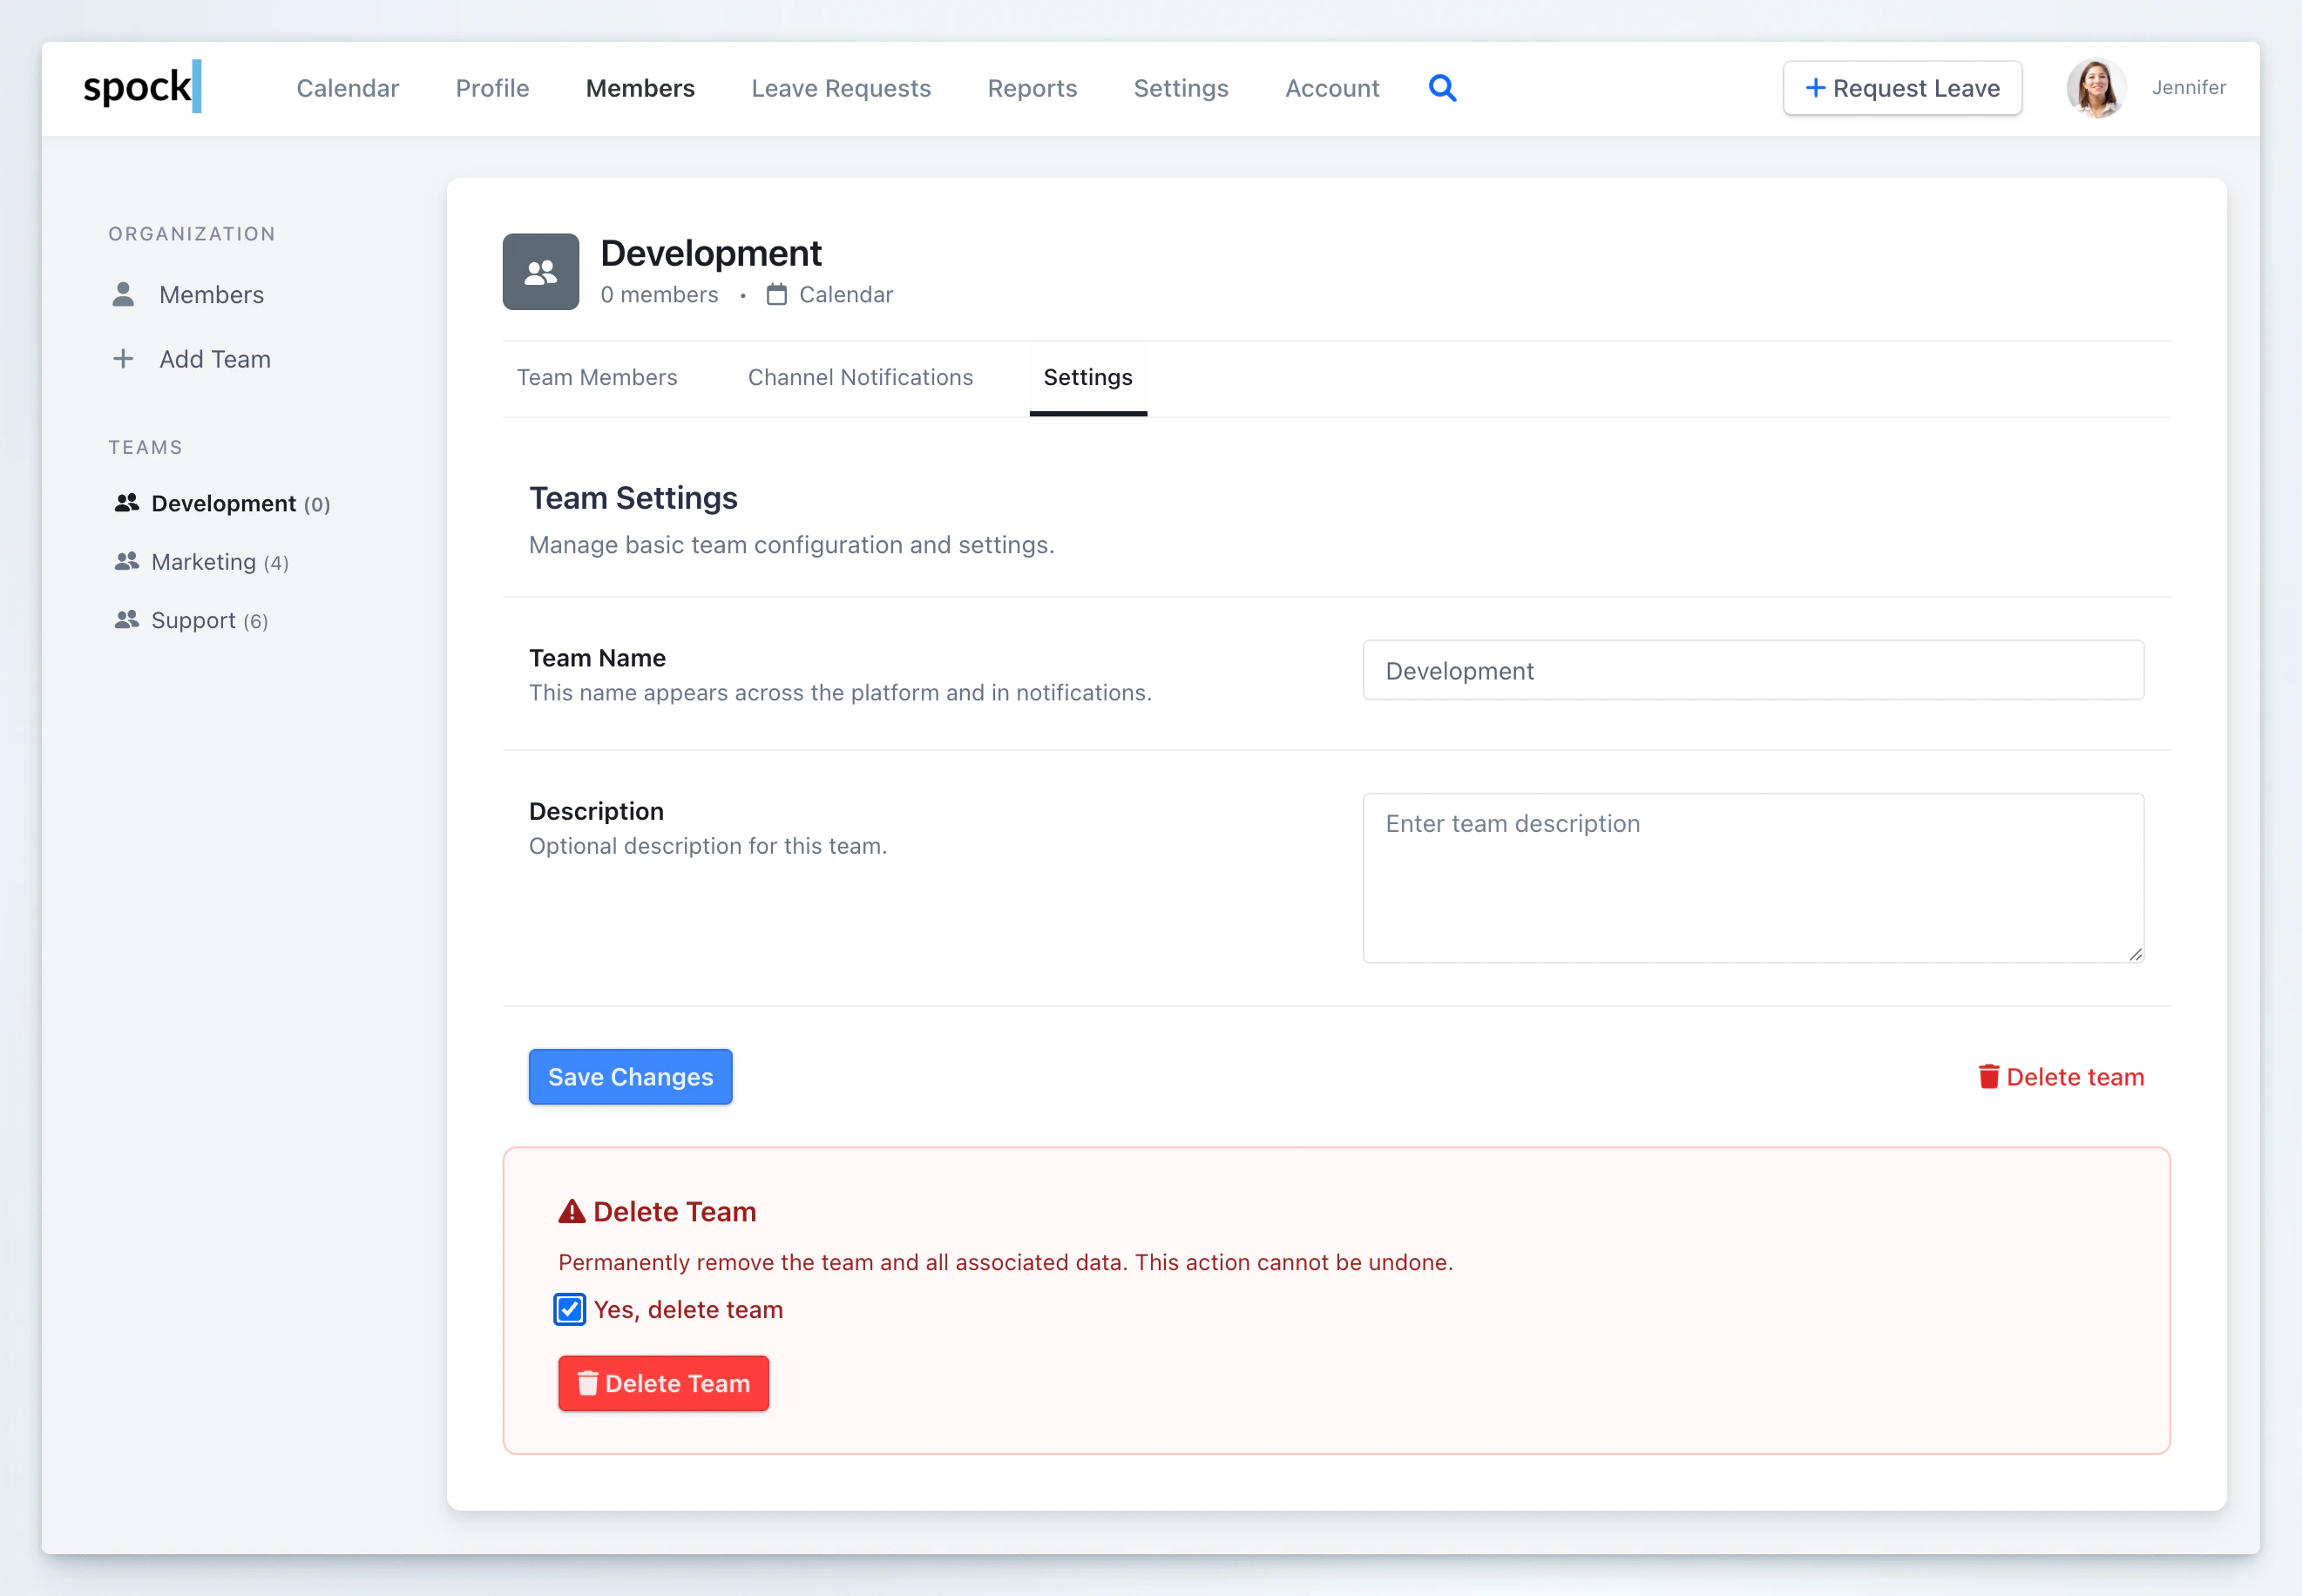
4
Complete deletion
Click the Delete Team button to permanently remove the team.
Managing User Memberships via Profile
Alternatively, manage team memberships directly from user profiles:1
Access user profile
Go to Members, search for the user, and open their profile.
2
Navigate to roles
Click the “Roles and Teams” tab.
3
Add membership
Click “Add New Membership” to assign the user to a team.
4
Configure membership
Select the Team and assign the appropriate Role.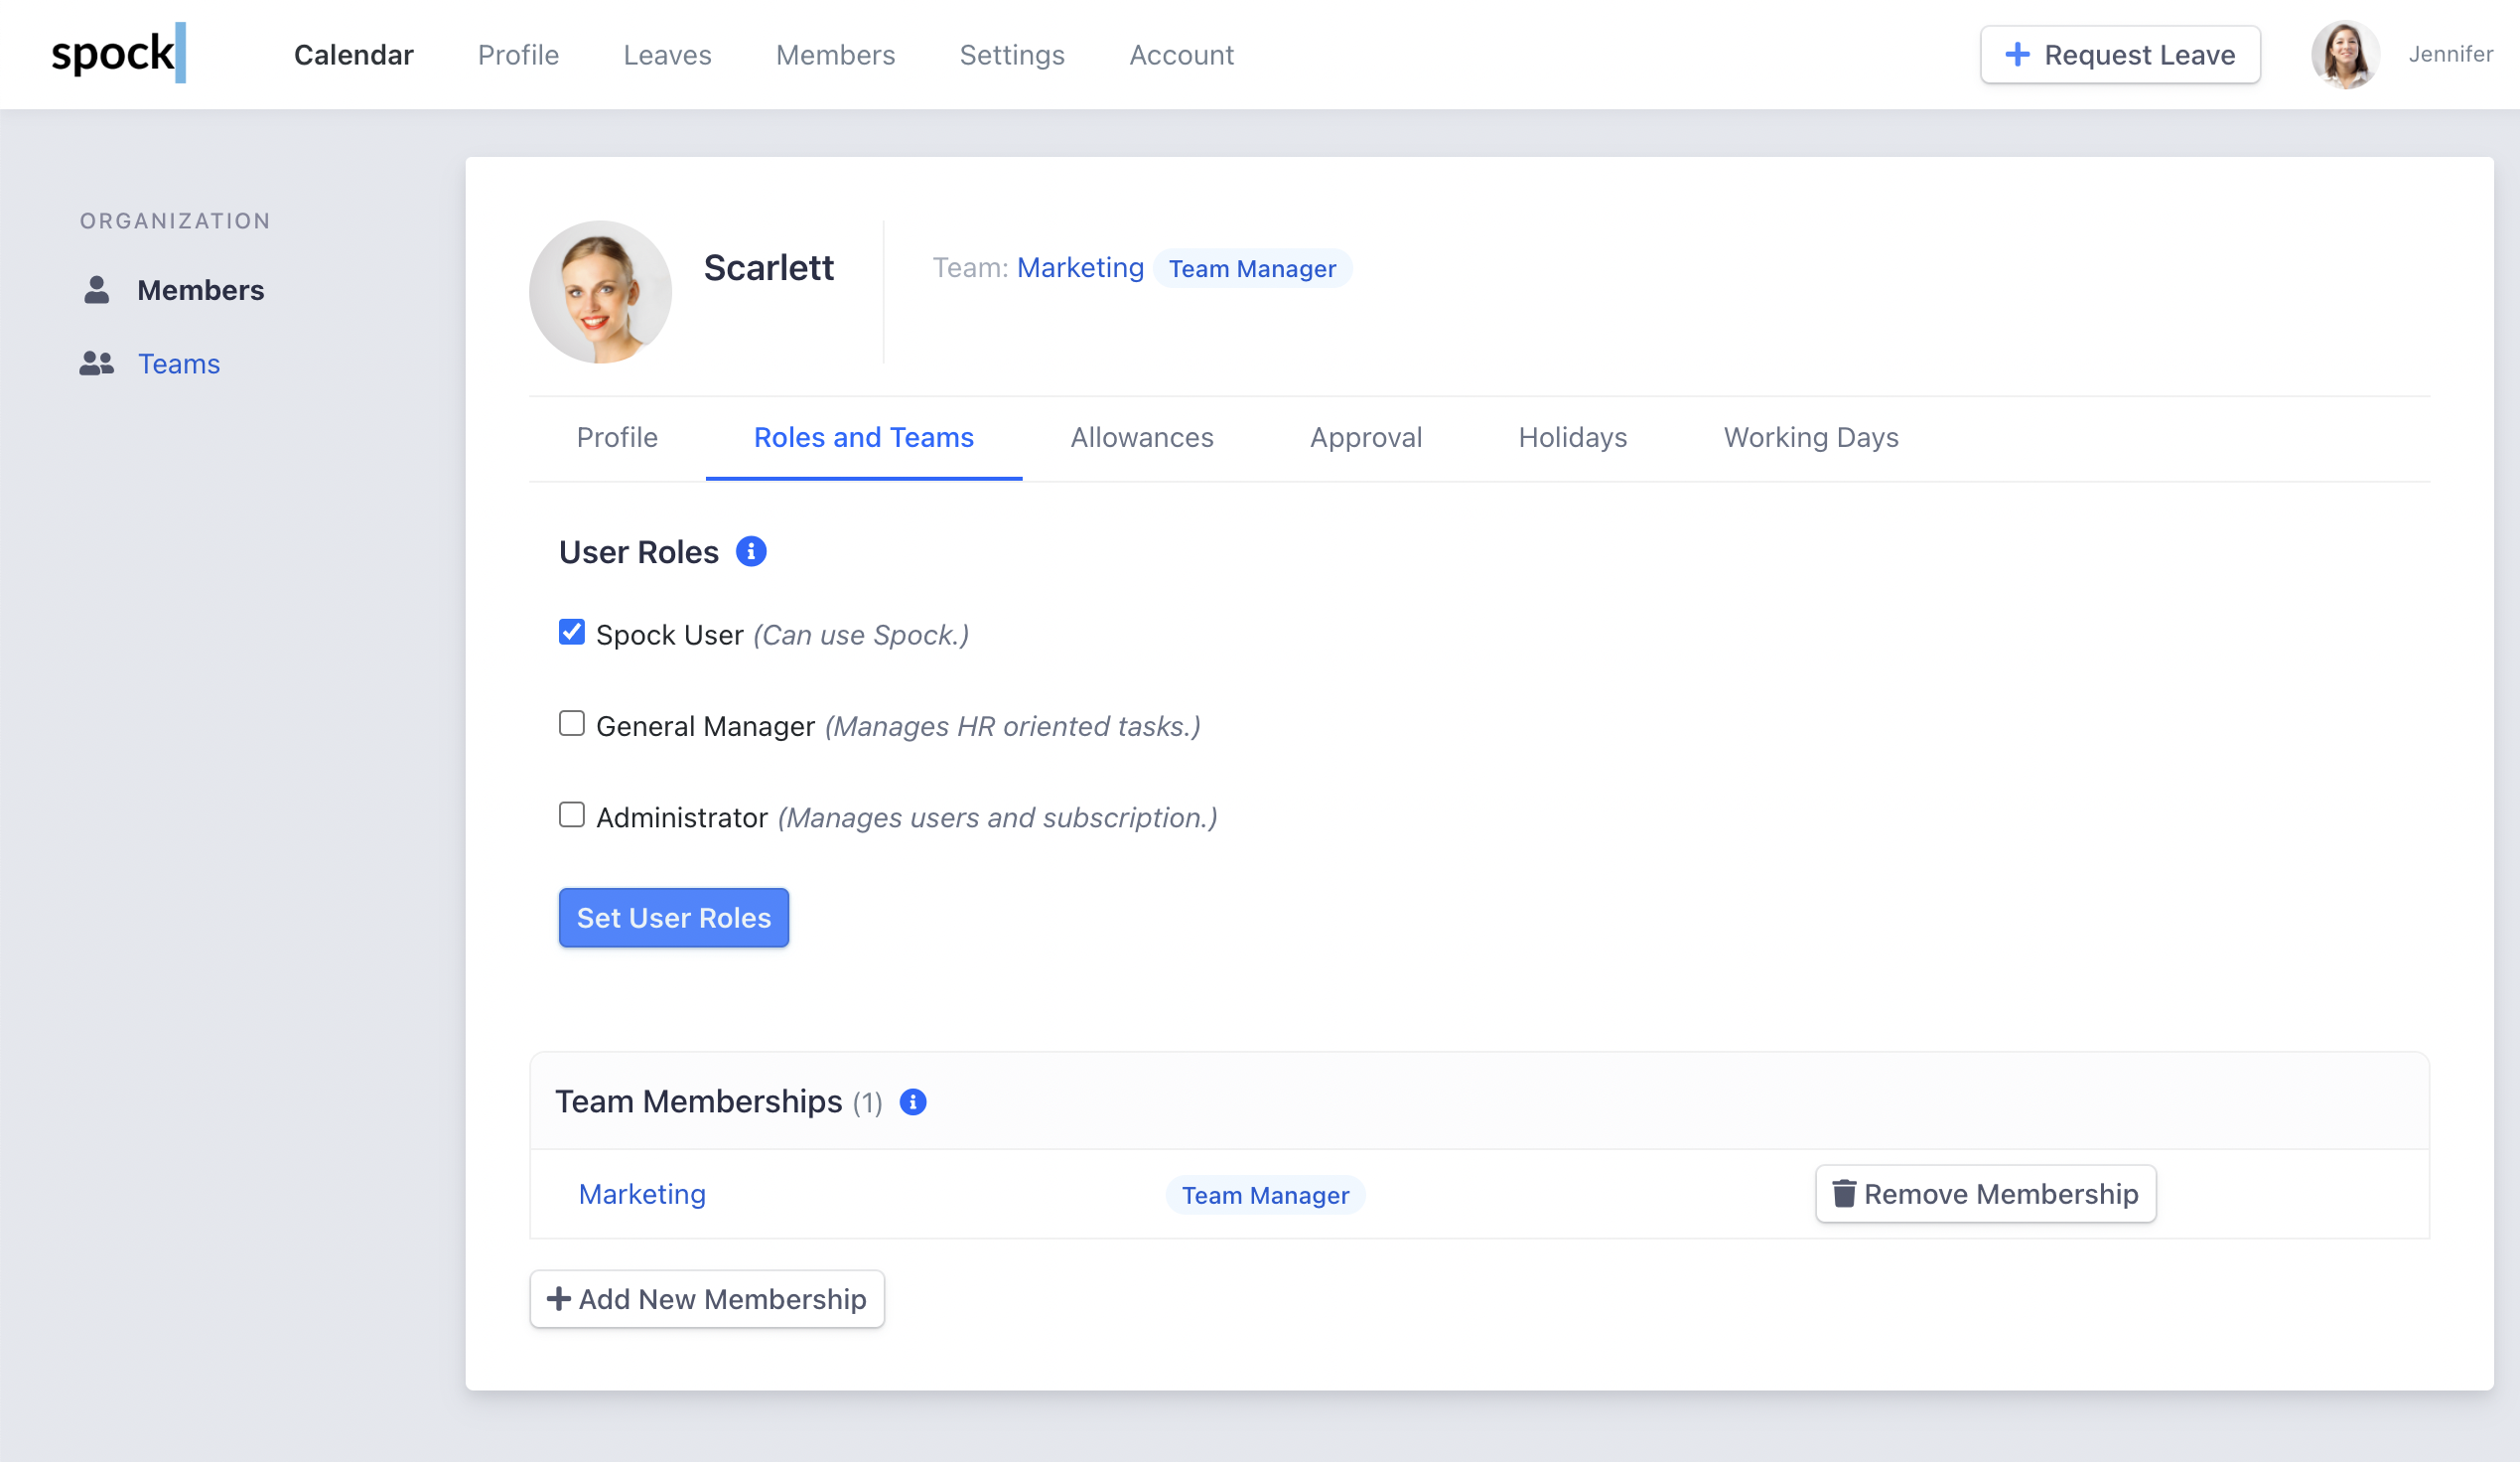
5
Save changes
Click Save to confirm the new team membership.
Team Notifications
Each team can configure automated Slack channel notifications to keep members informed about leave activities. Team notifications include daily and weekly summaries, plus real-time event alerts for leave requests.For detailed setup instructions and configuration options, see Team Notifications.
Related Topics
Team Notifications
Configure team-specific Slack channel notifications.
Managing Approvals
Learn how Team Managers handle leave approvals.
User Administration
Manage user roles and permissions across the organization.
Channel Notifications
Configure organization-wide Slack channel notifications.
Personal Notifications
Learn about personal notification settings and morning reports.
Substitutes
Set up coverage arrangements within teams.
Team notifications help maintain transparency and enable better coordination when team members take leave, ensuring projects and responsibilities are properly managed.