Benefits of Team Channel Notifications
- Team-focused updates: Only see leave information for your team members
- Flexible scheduling: Configure daily and weekly summaries independently
- Event-driven alerts: Get notified instantly when leave requests are created, approved, rejected, deleted, or canceled
- Centralized communication: Keep all team leave information in one dedicated Slack channel
Accessing Team Channel Notifications
1
Navigate to Teams
Go to Members > Teams in the dashboard.
2
Select your team
Choose the team you want to configure notifications for.
3
Open Channel Notifications
Click the Channel Notifications tab.
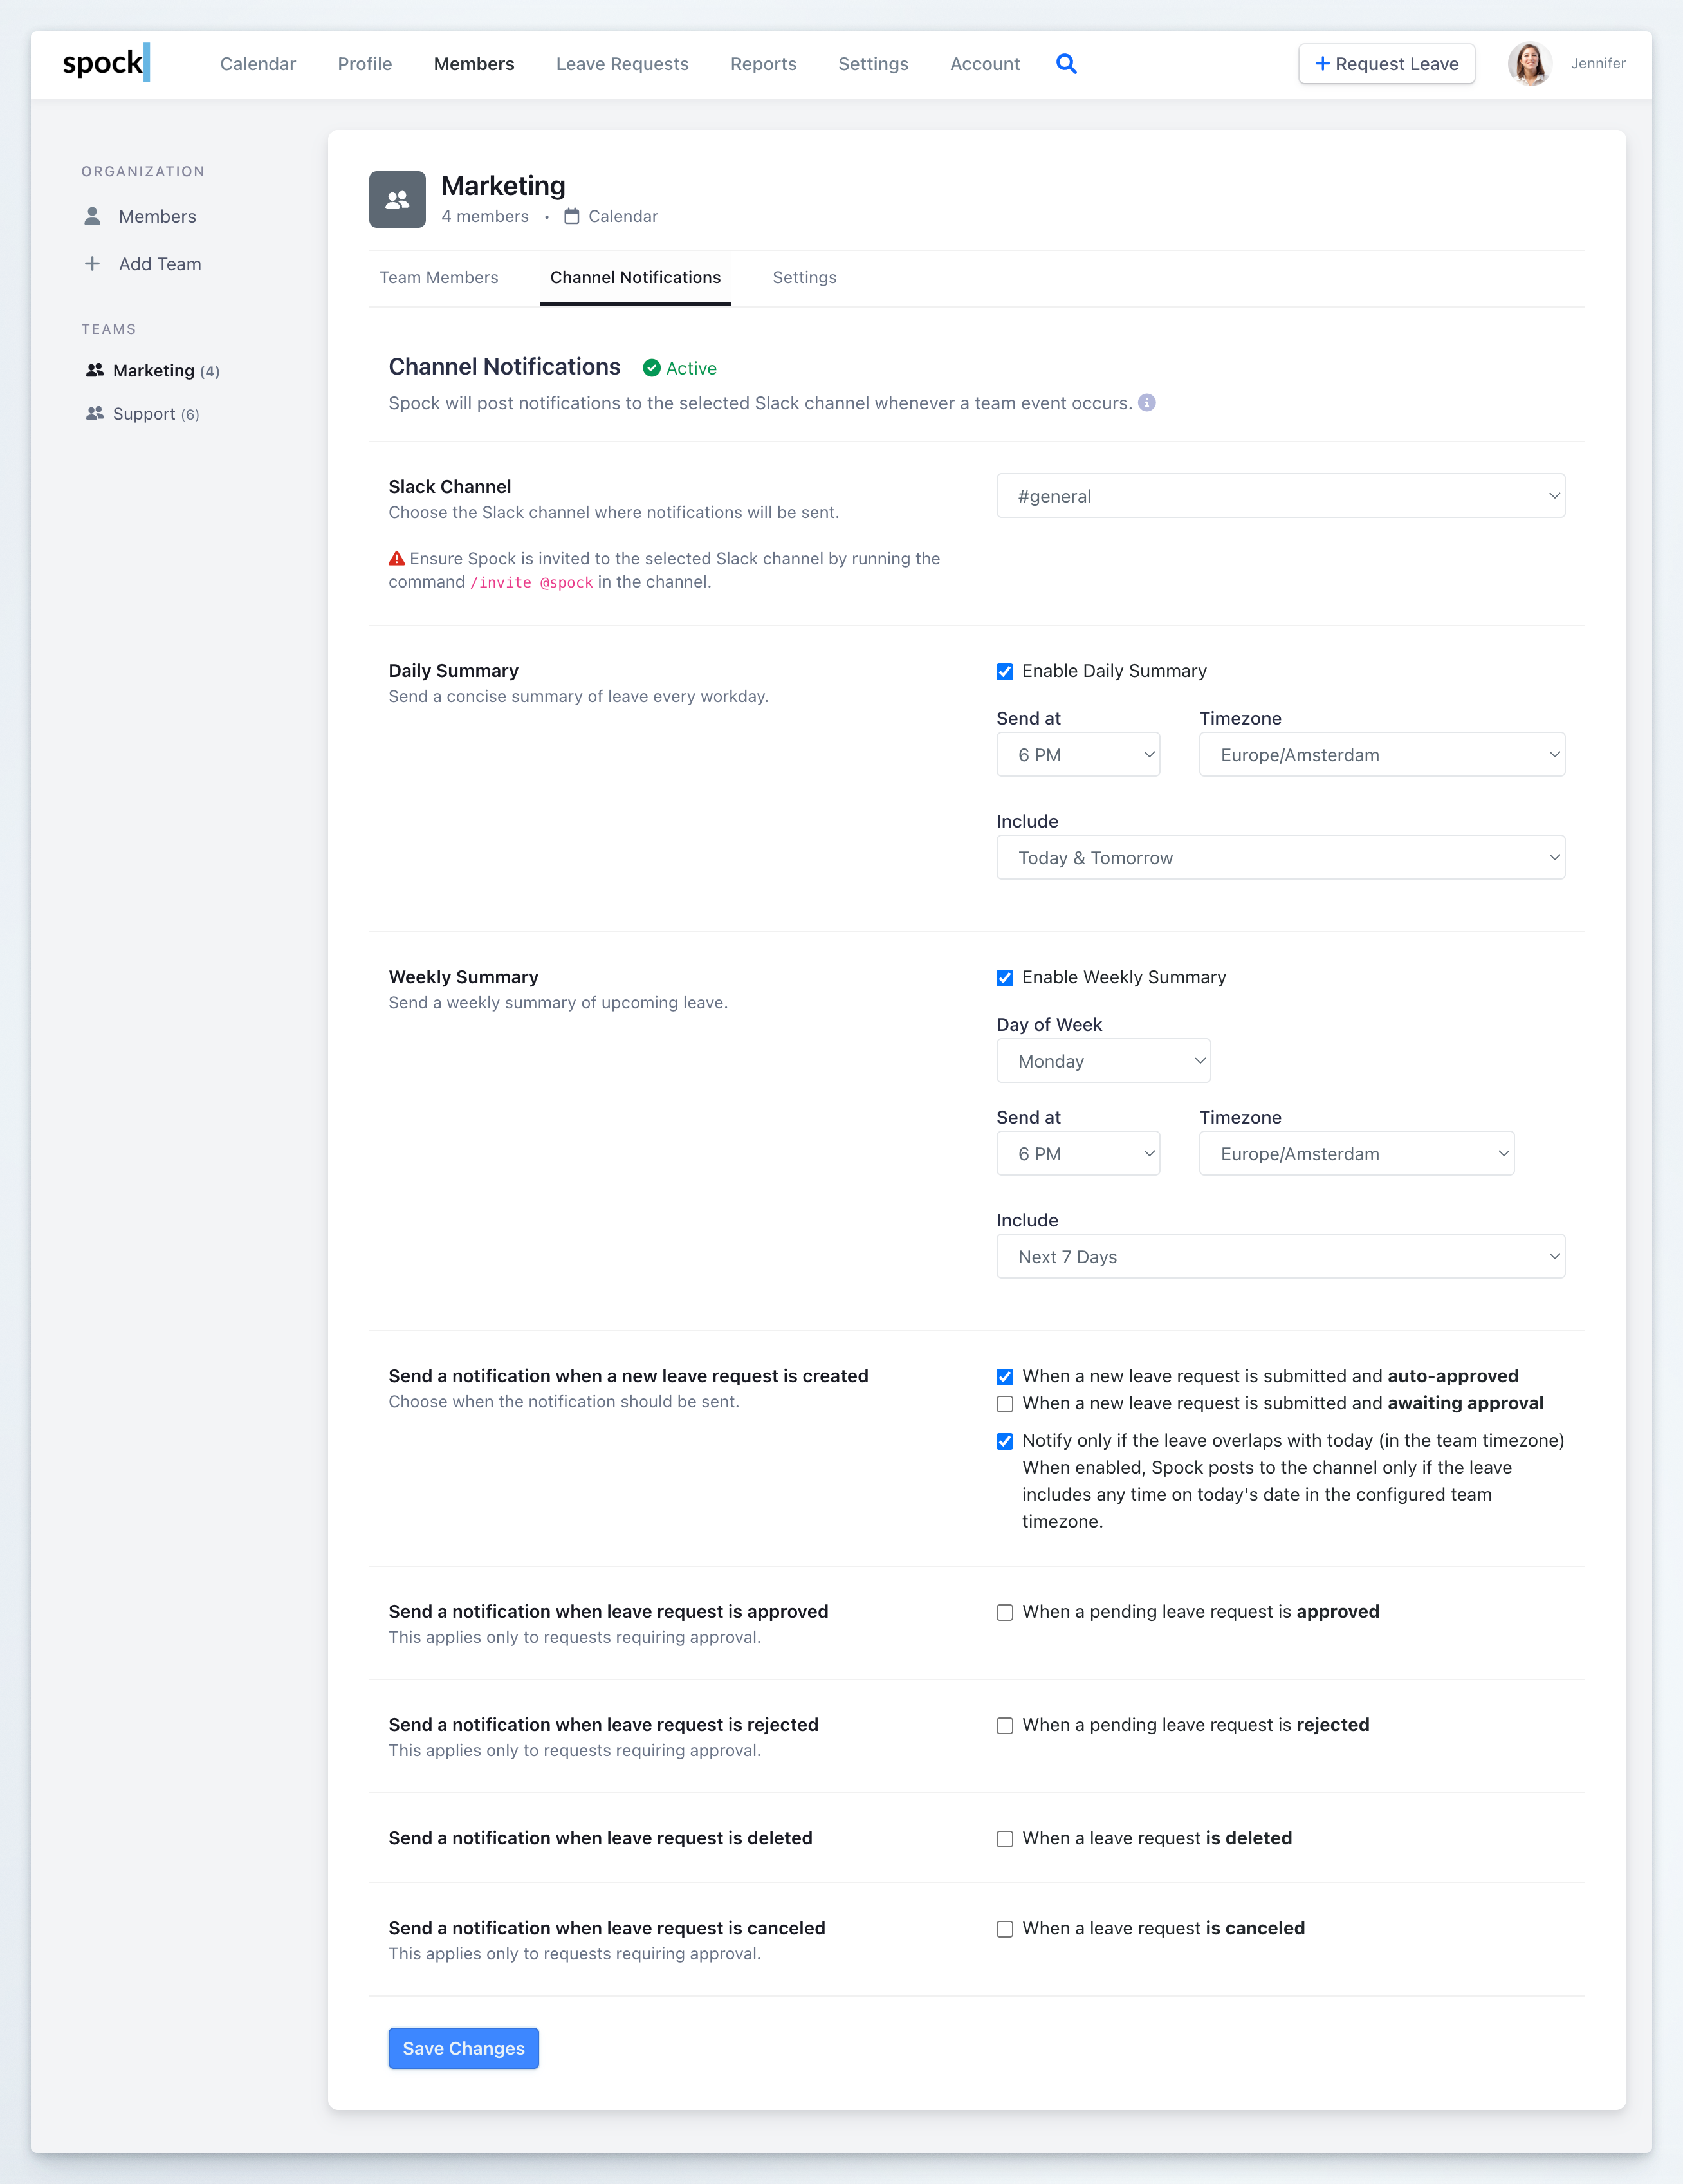
Configuring the Slack Channel
Before setting up any notifications, you must designate which Slack channel will receive the team’s updates.1
Enable notifications
Verify that the Channel Notifications toggle is set to Active.
2
Select Slack channel
Choose your preferred channel from the Slack Channel dropdown menu.
Setting Up Daily Summary
The Daily Summary provides a concise overview of team member leave every workday.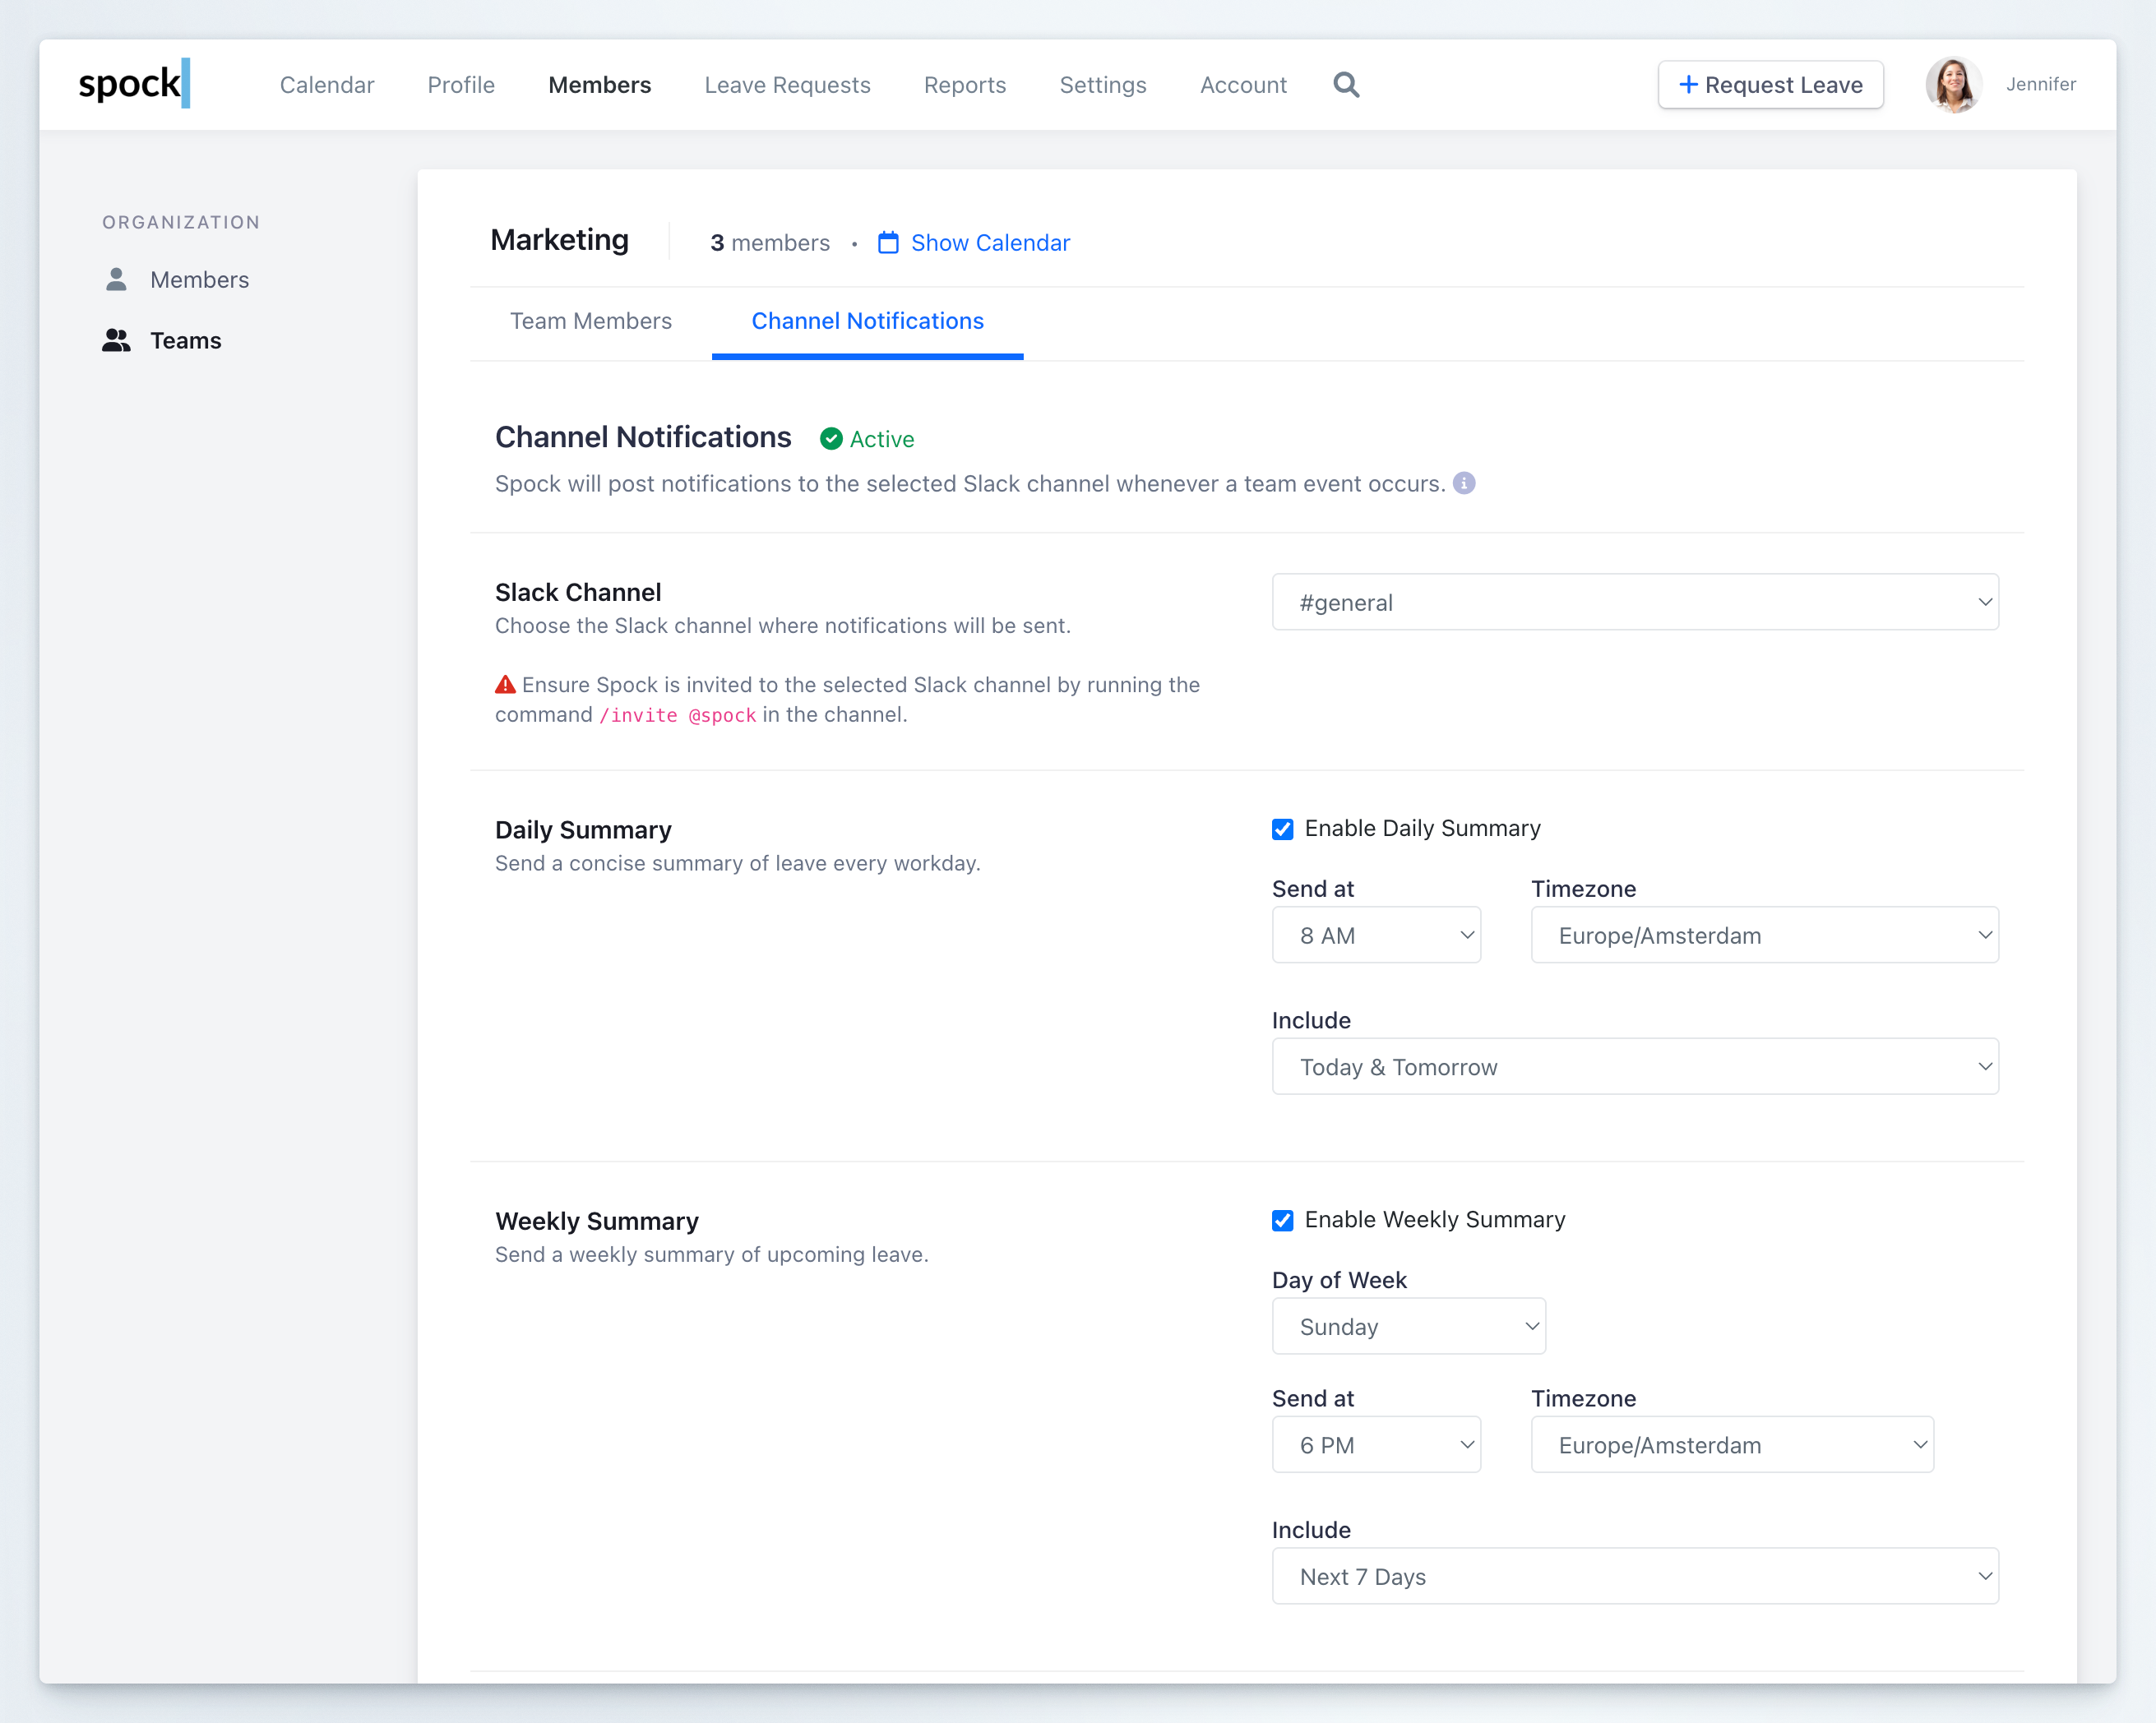
1
Enable Daily Summary
Check the Enable Daily Summary checkbox to activate daily notifications for your team.
2
Set delivery time
Configure when the summary should be sent:
- Send at: Choose the time of day (e.g., 8 AM before work begins)
- Timezone: Select the appropriate timezone for your team
3
Define content scope
Select which leave information to include from the Include dropdown:
- Today & Tomorrow: See both today’s and tomorrow’s leave (recommended for comprehensive awareness)
- Today: Only include leave occurring today
- Tomorrow: Only include leave occurring tomorrow
Setting Up Weekly Summary
The Weekly Summary gives your team a broader view of upcoming leave for better planning.1
Enable Weekly Summary
Check the Enable Weekly Summary checkbox to activate weekly notifications.
2
Choose delivery schedule
Configure when the weekly summary should be sent:
- Day of Week: Select which day to send the summary (e.g., Sunday to prepare for the week ahead, or Monday to start the week informed)
- Send at: Choose the time of day (e.g., 6 PM)
- Timezone: Select the appropriate timezone
3
Set look-ahead period
Select the time range from the Include dropdown:
- Next 7 Days: One week ahead (ideal for short-term team planning)
- Next 14 Days: Two weeks ahead (better for medium-term coordination)
- Next 30 Days: One month ahead (comprehensive long-term visibility)
You can enable both Daily and Weekly summaries simultaneously. They complement each other by providing both immediate and strategic visibility.
Configuring Event Notifications
Event notifications send real-time alerts to your team’s Slack channel when specific leave-related actions occur. This keeps everyone immediately informed of changes affecting team availability.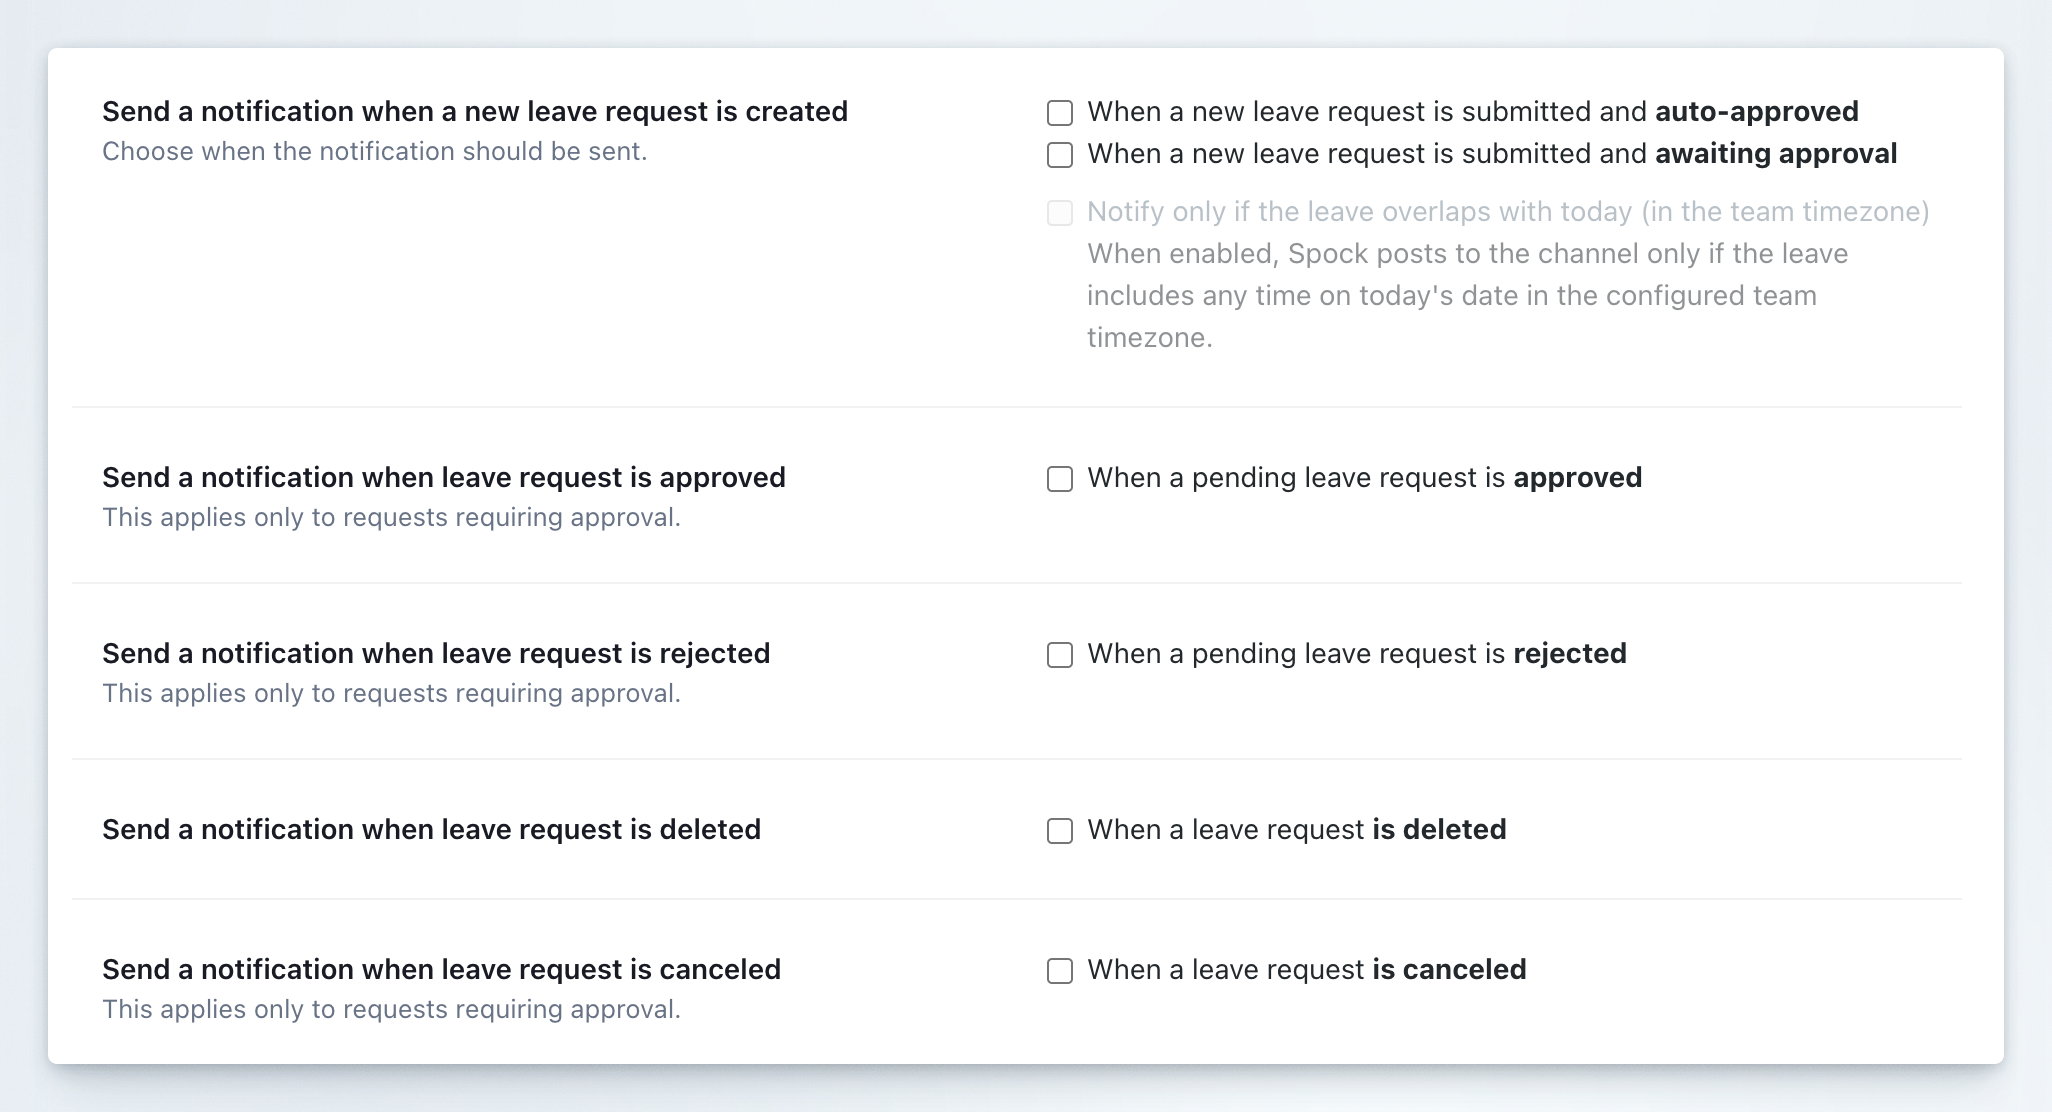
1
Access event settings
Scroll to the Send a notification when section to configure event-based alerts.
2
Configure creation notifications
Under Send a notification when a new leave request is created, choose:
- When a new leave request is submitted and auto-approved: Notify when leave is automatically approved without requiring manager review
- When a new leave request is submitted and awaiting approval: Notify when leave requires approval from a manager
3
Enable approval notifications
Check When a pending leave request is approved to notify the team when a manager approves a leave request.
This applies only to requests requiring approval.
4
Enable rejection notifications
Check When a pending leave request is rejected to notify the team when a manager rejects a leave request.
This applies only to requests requiring approval.
5
Enable deletion notifications
Check When a leave request is deleted to notify the team when any leave request is permanently removed from the system.
6
Enable cancellation notifications
Check When a leave request is canceled to notify the team when an approved leave is canceled.
This applies only to requests requiring approval.
7
Save your configuration
Click Save Changes to activate all your notification settings.
Best Practices for Team Notifications
Recommended Event Notifications
- Small teams (under 10 people): Enable all events for complete visibility
- Medium teams (10-30 people): Enable approved, rejected, and canceled events; consider disabling creation events to reduce noise
- Large teams (over 30 people): Focus on approved and canceled events only; rely on summaries for awareness
Daily vs Weekly Summaries
- Use Daily Summaries for operational teams that need real-time coordination
- Use Weekly Summaries for strategic planning and longer-term visibility
- Combine both for teams that need both tactical and strategic awareness
Channel Strategy
- Create dedicated team channels like
#team-marketing-leavefor focused communication - Avoid using your main team channel to prevent notification overload
- Use private channels for teams handling sensitive information
Related Topics
Teams
Learn how to create and manage teams.
Channel Notifications
Configure organization-wide Slack channel notifications.
Personal Notifications
Learn about personal notification settings and morning reports.
Managing Approvals
Understand how Team Managers handle leave approvals.
Team notifications help maintain transparency and enable better coordination when team members take leave, ensuring projects and responsibilities are properly managed.