You must have a General Manager role to process carryover. The carryover process can be executed from the start of the year until the end of March.
Understanding Carryover
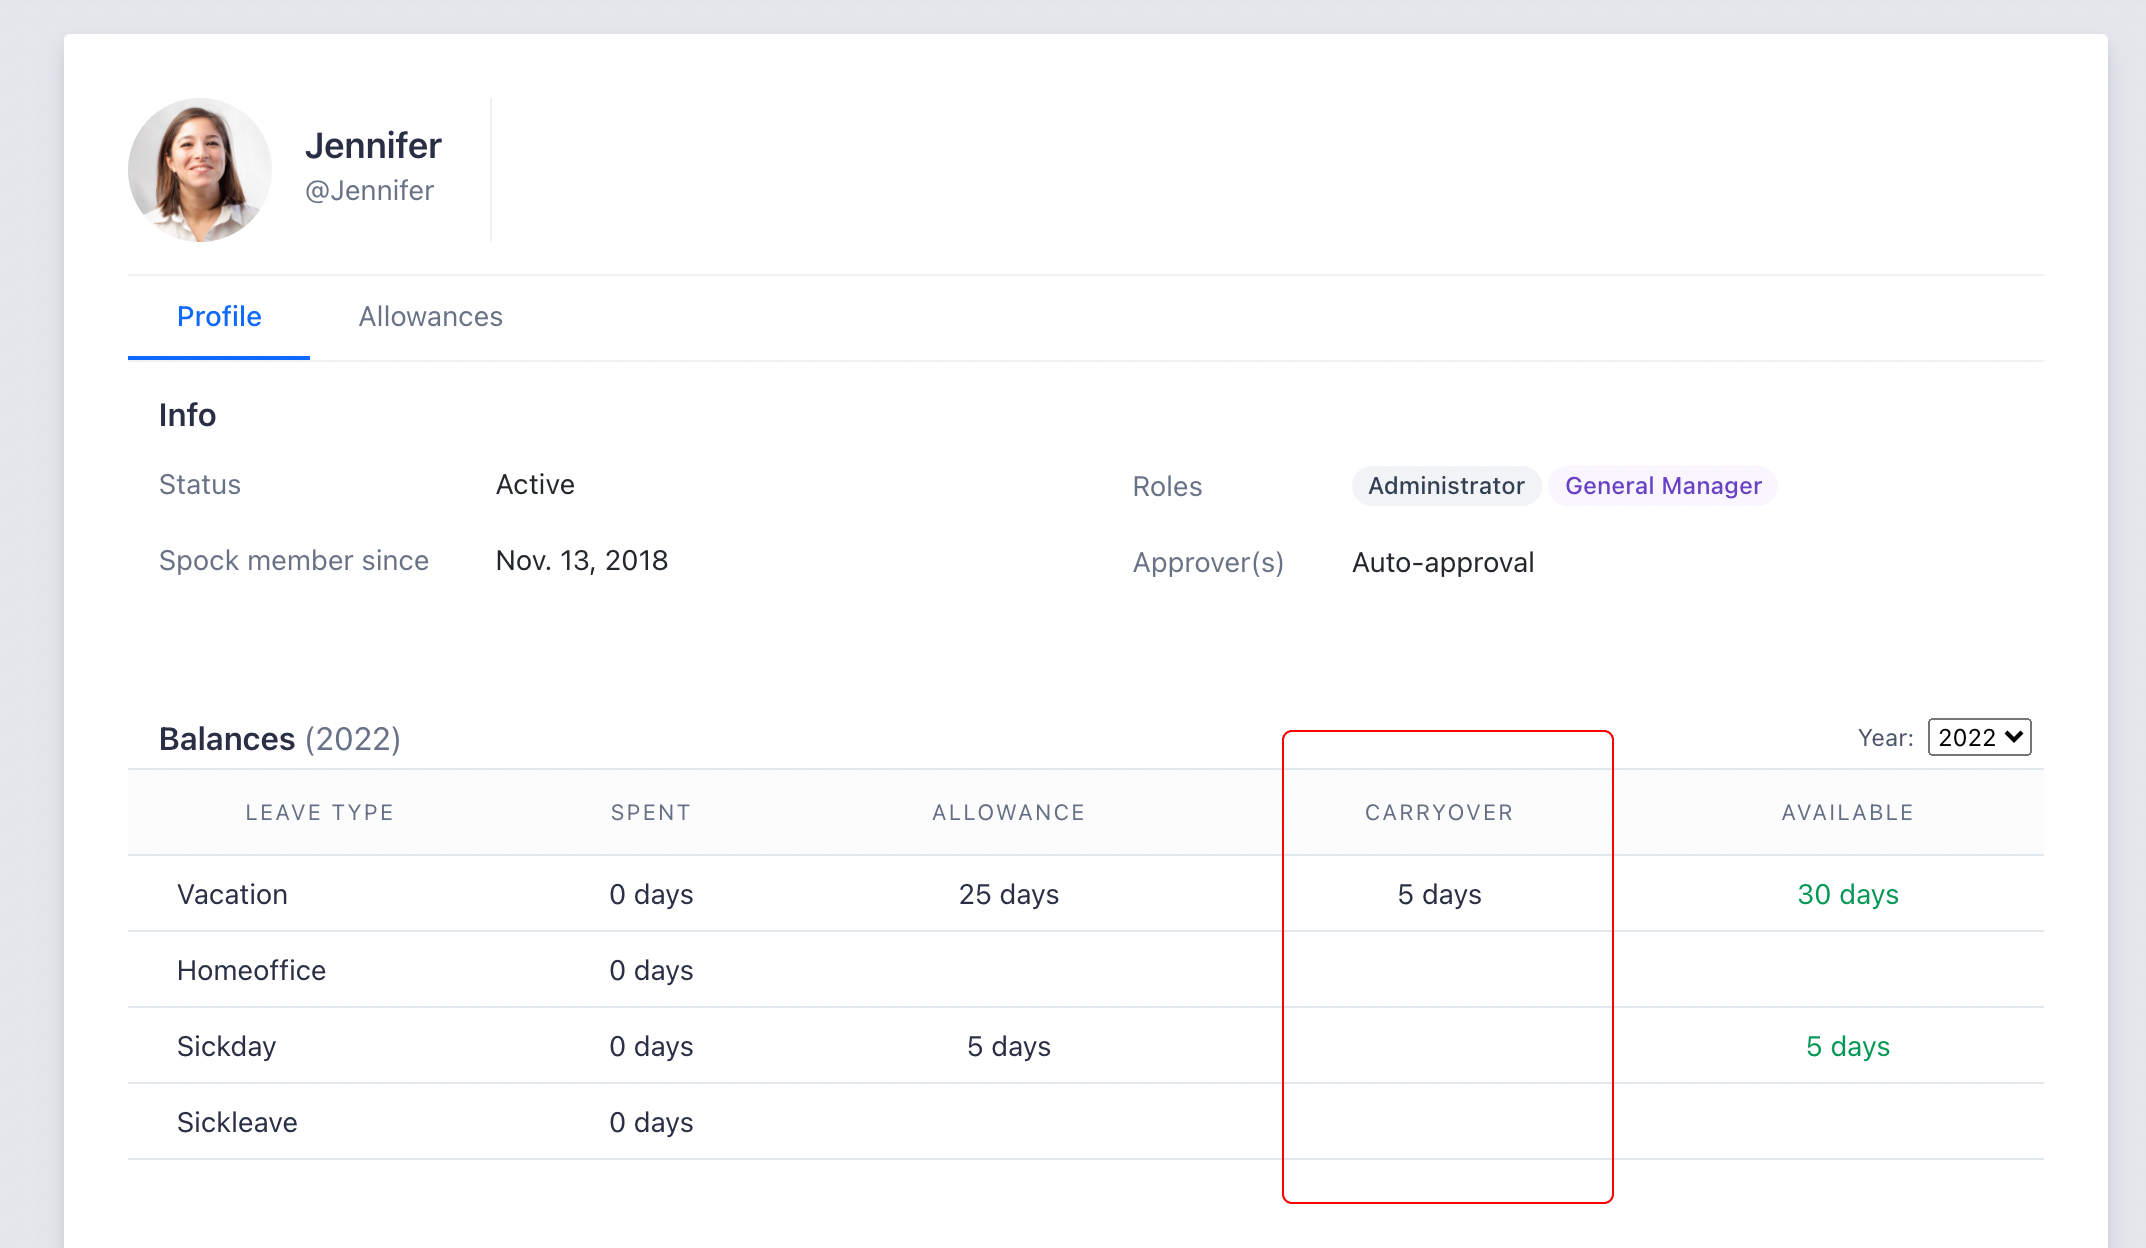
Carryover amounts are visible in:- Members’ profiles under the “Balances” section
- Slack in “My Balances” view
Carryover Policies
Choose from three carryover policies to determine how unused balances transfer to new periods:No Carryover
No Carryover
Unused balances will not be transferred to a new period.Example: Balance of 5 days at year-end results in zero carryover.
Remaining Count
Remaining Count
The entire unused balance transfers to the new period.Example: Balance of 5 days at year-end results in 5 days carryover.
Limited Count
Limited Count
Only a specified maximum number of days transfer to the new period.Example: With a 3-day limit, a balance of 5 days results in 3 days carryover.
Carryover Expiration
For “Remaining Count” and “Limited Count” policies, you can set an expiration period: Example: With 31-day expiration and 5 days carryover, the carryover remains available until January 31st, then expires.Setting Up Carryover Policies
Configure carryover policies for each leave type that has allowances enabled:1
Navigate to Leave Types
Go to Settings > Leave Types in your dashboard.
2
Select leave type
Choose a leave type that has allowance tracking enabled.
3
Enable carryover
Check “Allow carryover of current balances to next period”.
4
Choose policy
Select your desired carryover policy from the available options.
5
Set limitations
If using “Limited Count” policy, enter the maximum carryover limit.
6
Configure expiration
(Optional) Check “Carryover expires” and enter the number of days until expiration.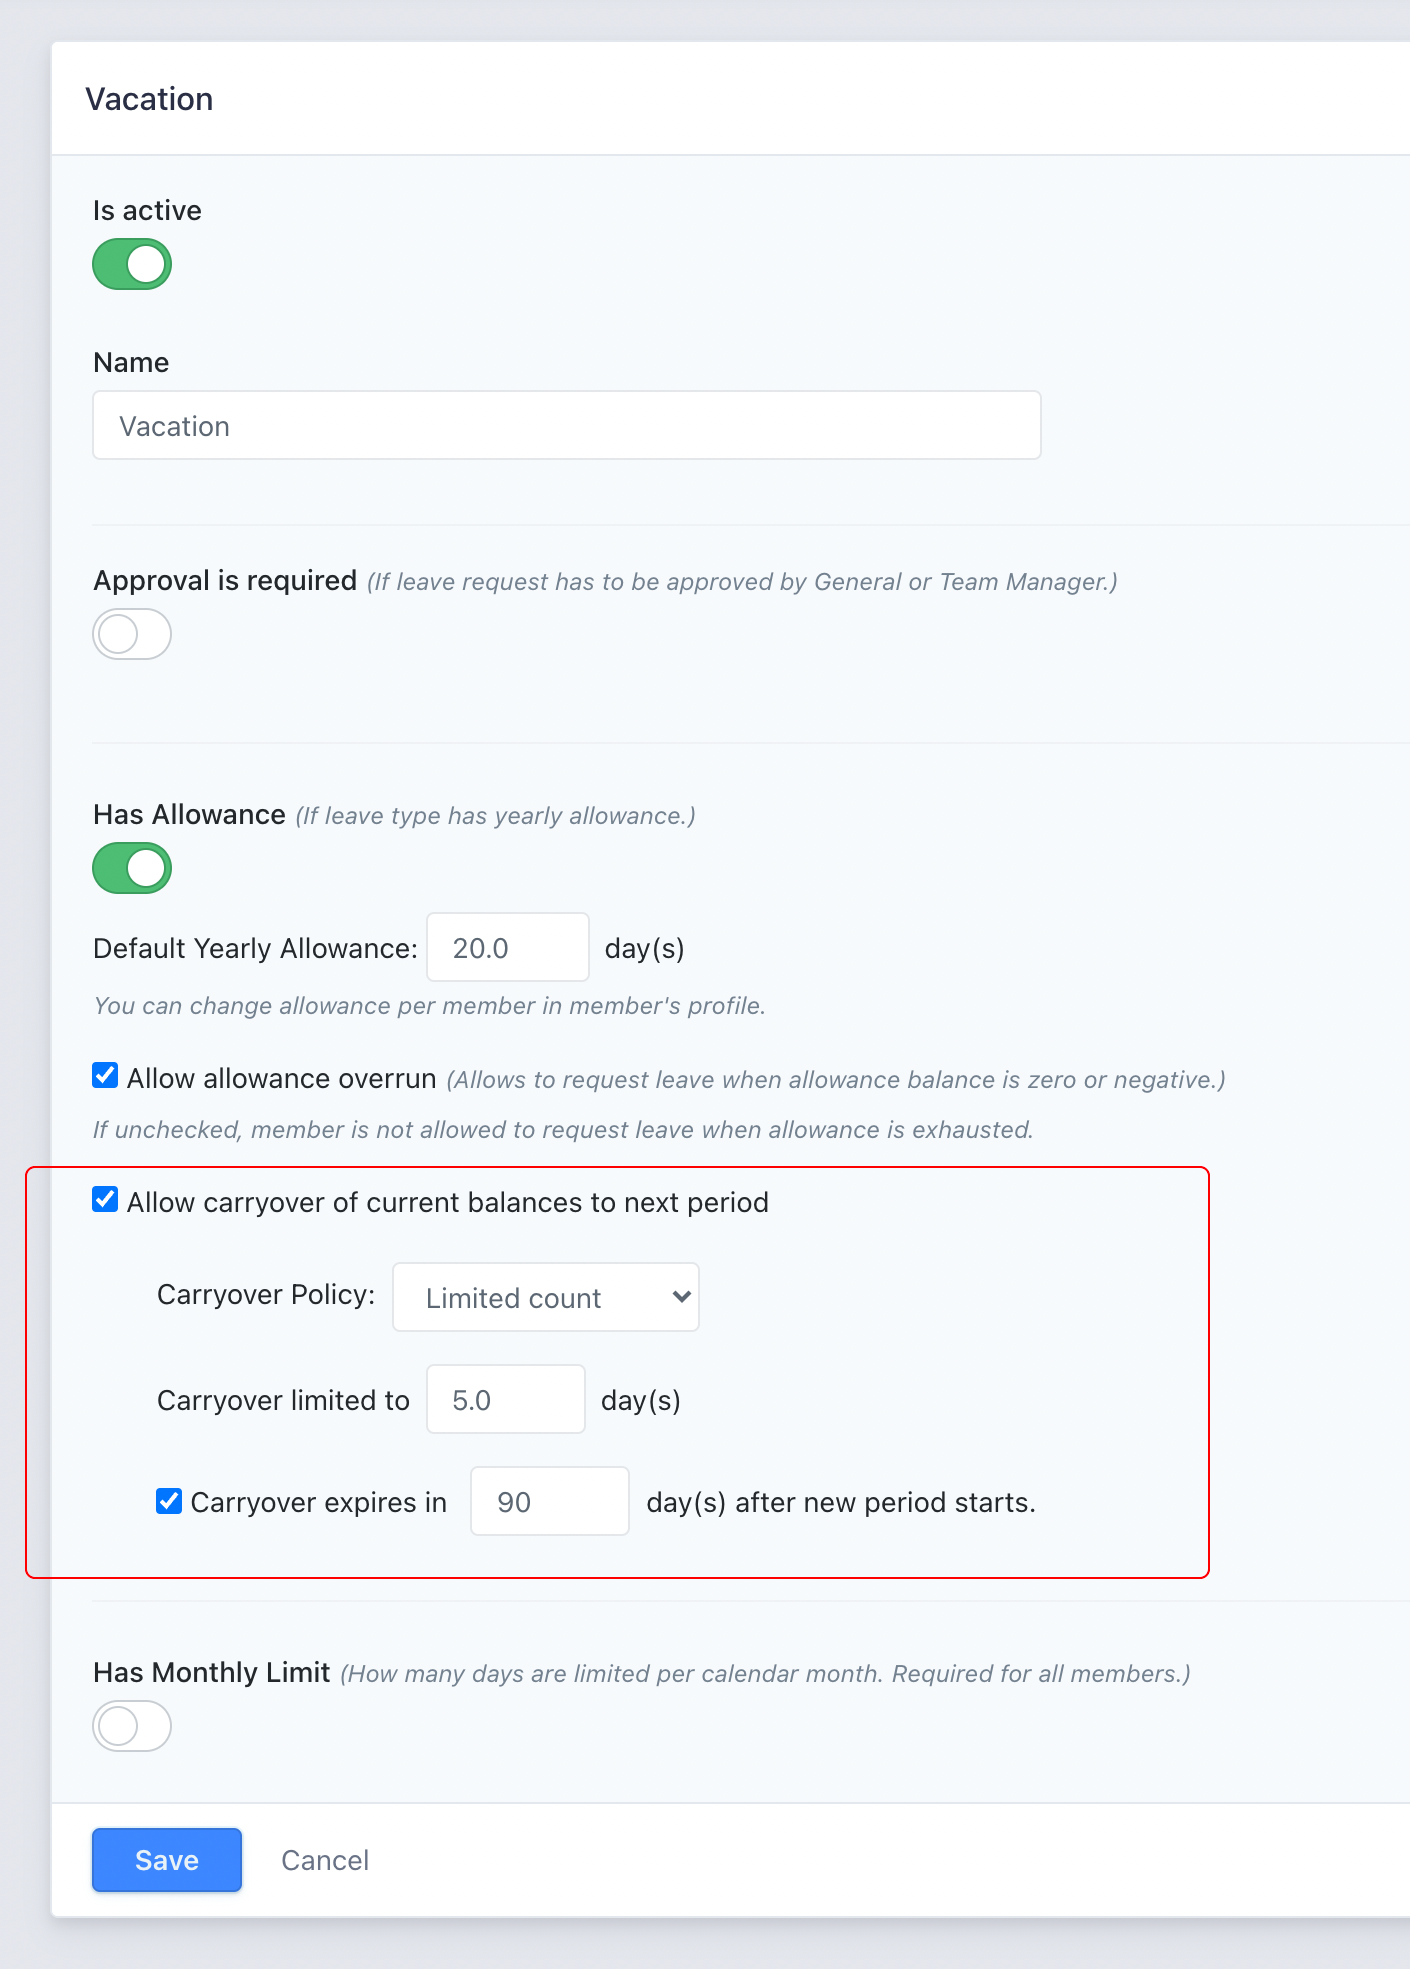
7
Save settings
Click Save to apply the carryover policy.
Executing the Carryover Process
Once policies are configured, execute the carryover process to transfer balances:1
Access carryover settings
Navigate to Settings > Carryover.
2
Enable carryover
Check “Do Balances Carryover” to initiate the process.
3
Proceed with carryover
Click “Proceed” to start the balance transfer.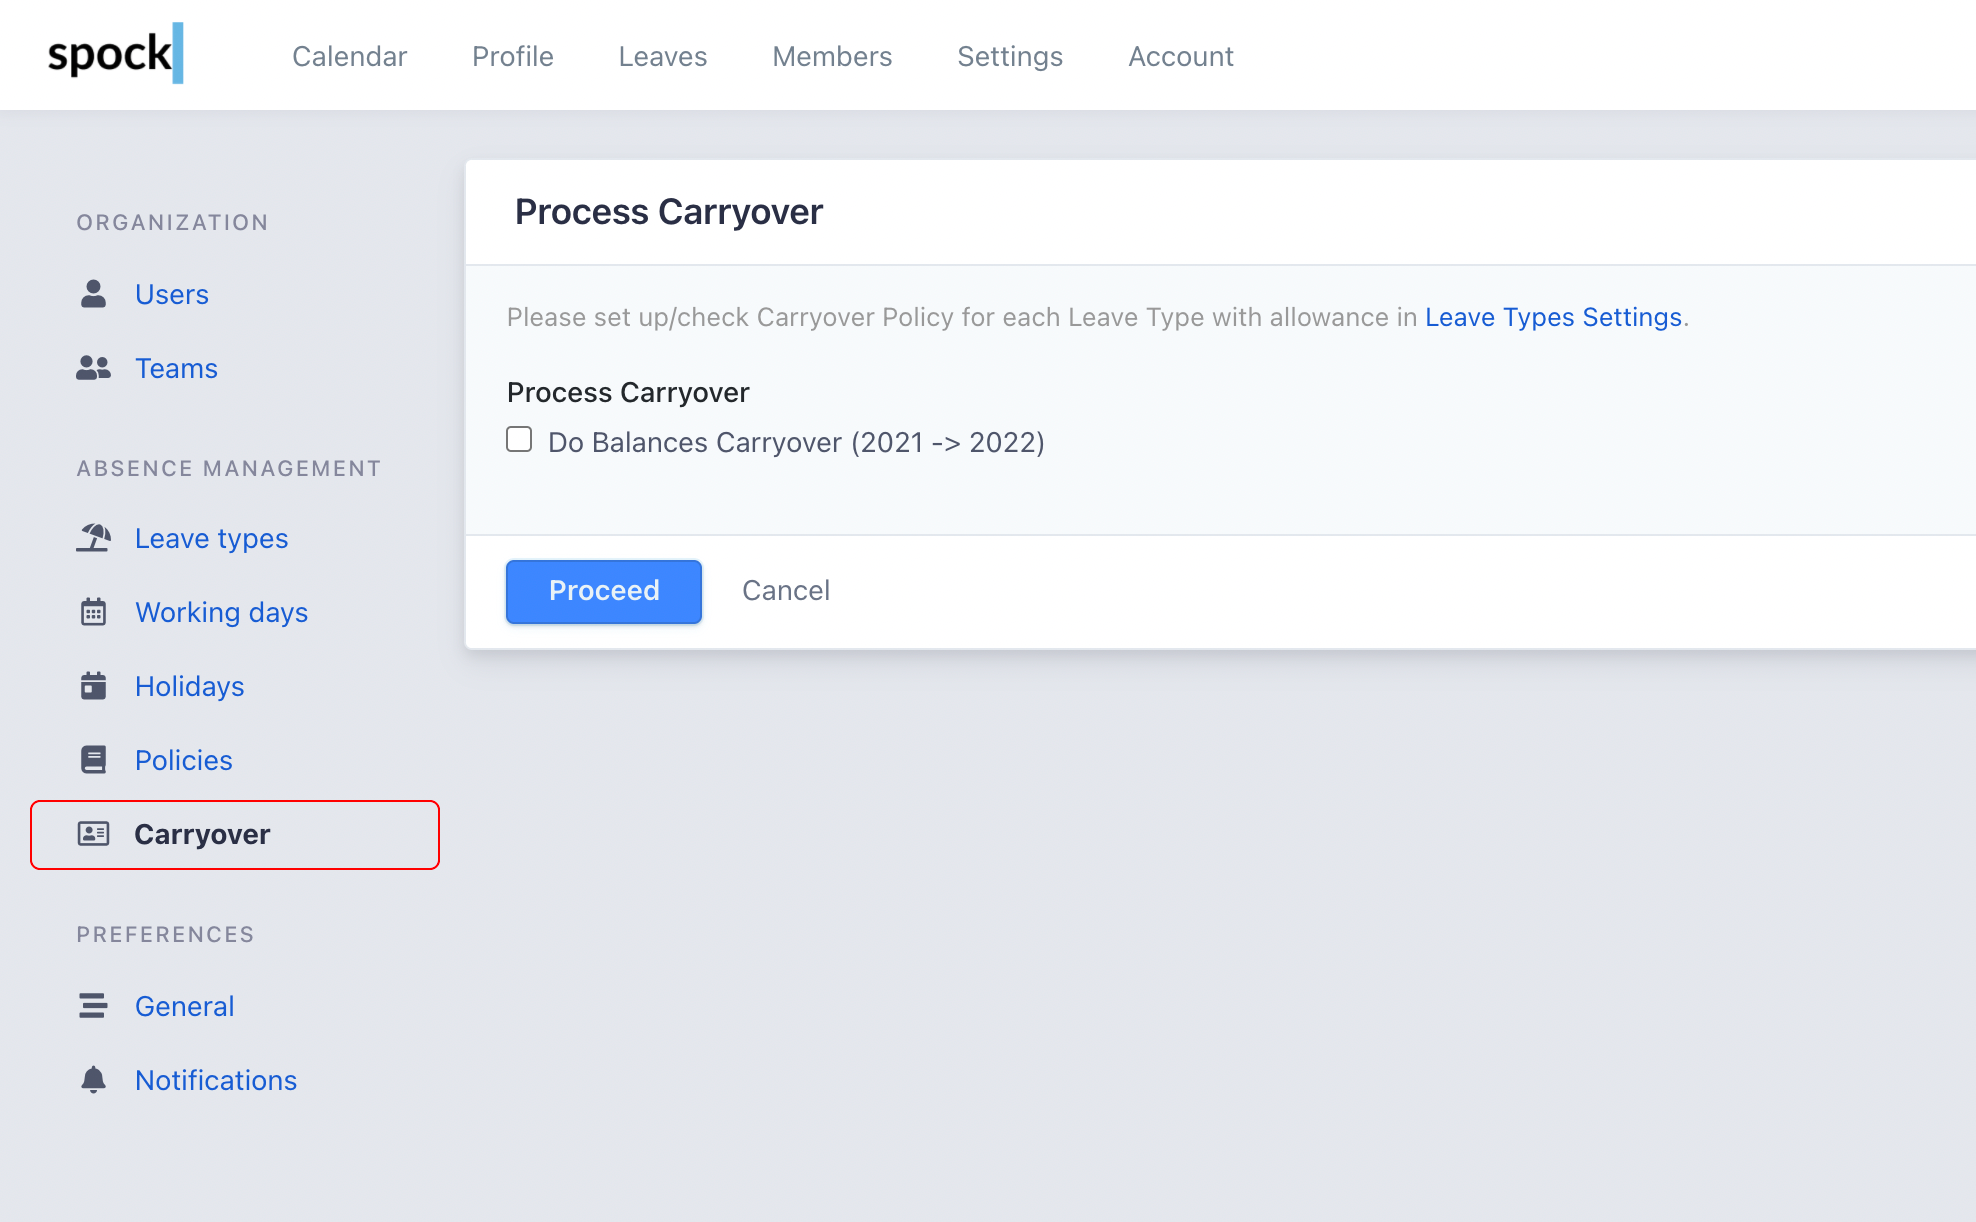
4
Wait for completion
The process may take some time to transfer all balances across your organization.
Customizing Carryover for Individual Members
Override the default carryover policy for specific employees when needed:1
Access member profile
Go to Members and select the employee’s profile.
2
Navigate to Allowances
Click on the “Allowances” tab.
3
Find leave type
Locate the leave type you want to customize carryover for.
4
Override policy
Click the “Override” button next to the default policy.
5
Customize settings
In the dialog that appears, check “Customize Carryover Policy” and configure the new policy.
6
Apply changes
Click “Save and Proceed Carryover” to recalculate the carryover according to the new policy.
Best Practices
Plan Ahead
Plan Ahead
Set up carryover policies before the end of the year to ensure smooth transition to the new period.
Communication
Communication
Inform employees about carryover policies and expiration dates to help them plan their leave effectively.
Regular Review
Regular Review
Review and adjust carryover policies annually to ensure they align with your organization’s needs and legal requirements.
Documentation
Documentation
Maintain records of custom carryover overrides for individual employees for audit and compliance purposes.
Related Topics
Leave Allowances
Learn how to configure and manage employee leave allowances.
Leave Types
Understand different types of leave and their configuration options.
Reports
Generate reports on carryover usage and patterns.
User Administration
Manage user roles required for carryover administration.