> ## Documentation Index
> Fetch the complete documentation index at: https://docs.spockoffice.com/llms.txt
> Use this file to discover all available pages before exploring further.
# Getting Started with Spock 🚀
> Follow these steps to setup Spock for your organization. It takes just a few minutes to get ready.
Follow these steps to setup Spock for your organization. It takes just few minutes to get ready.
Connect Spock to your Slack workspace
Configure leave types, approval workflows, and more
Organize your team structure and assign roles
Test the system with your first request
## Step 1. Add Spock to Slack
1. Visit our website [spockoffice.com](https://spockoffice.com/), go to **Pricing**, and choose your plan (the Professional plan includes a free trial). Then click **"Add Spock to Slack"**.
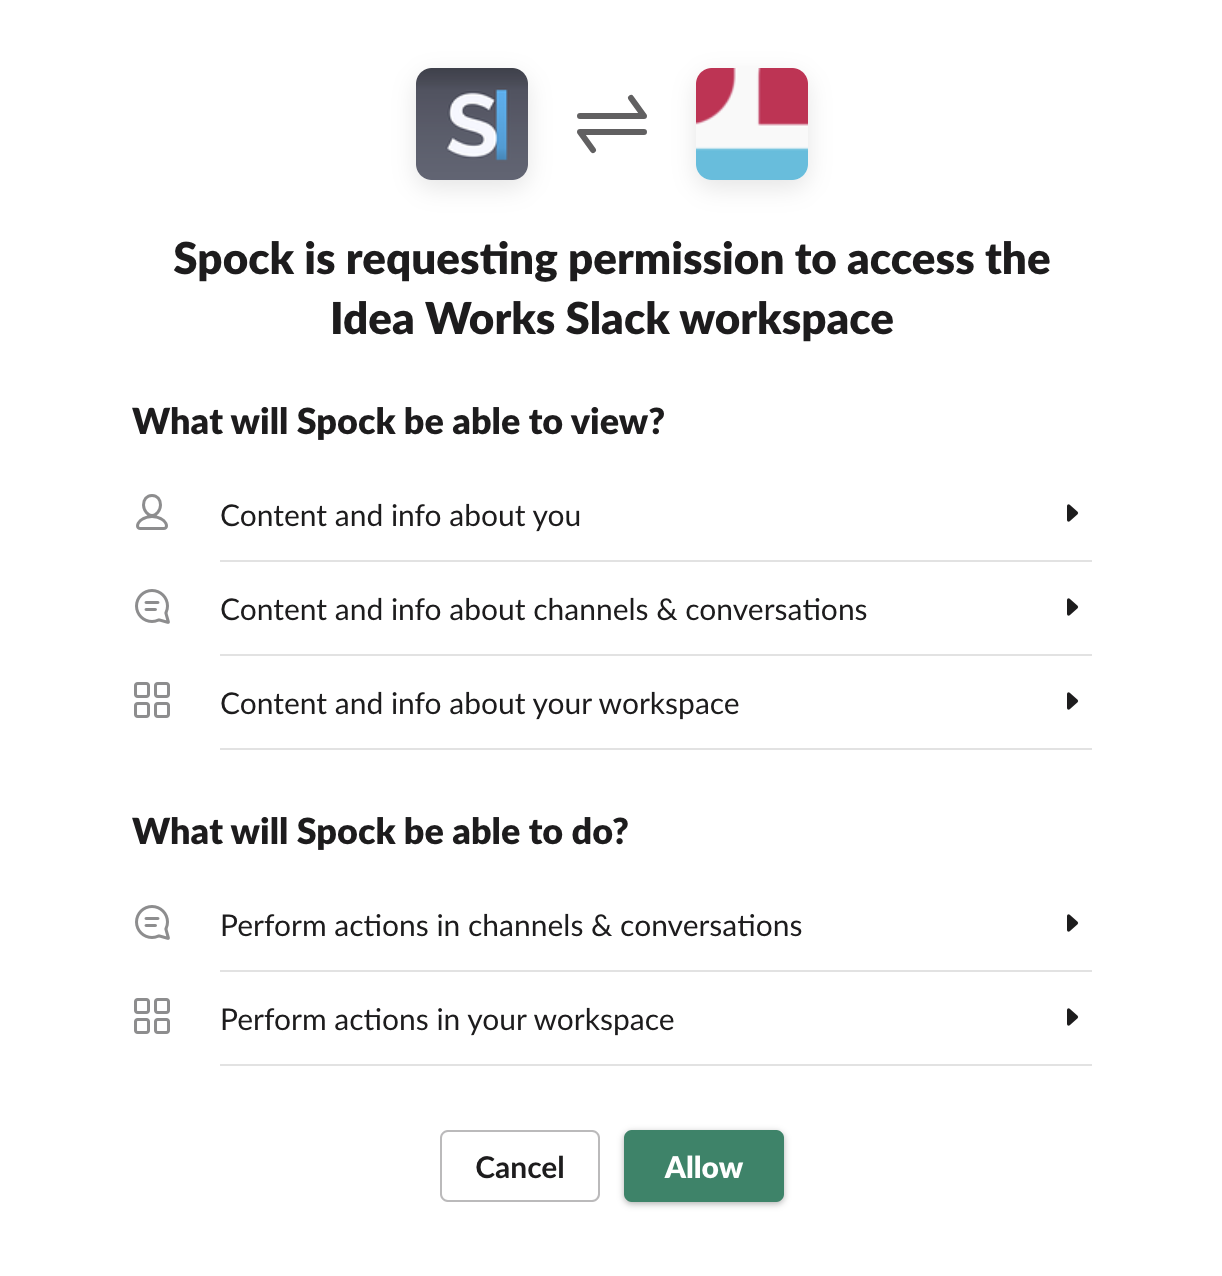
2. This action will redirect to the Slack website, where you have to **allow access permissions** for Spock in Slack. Please click on the **"Allow"** button. Do not forget to select your workspace in the top-right corner in the dropdown.
 />
At this moment Spock will install and it is ready to use. The next step is to set up leave policy for your organization.
## Step 2. Setup Leave Types
After allowing permissions for Spock, you will move to Spock Onboarding Wizard. There you can configure leave types and users.
/>
At this moment Spock will install and it is ready to use. The next step is to set up leave policy for your organization.
## Step 2. Setup Leave Types
After allowing permissions for Spock, you will move to Spock Onboarding Wizard. There you can configure leave types and users.
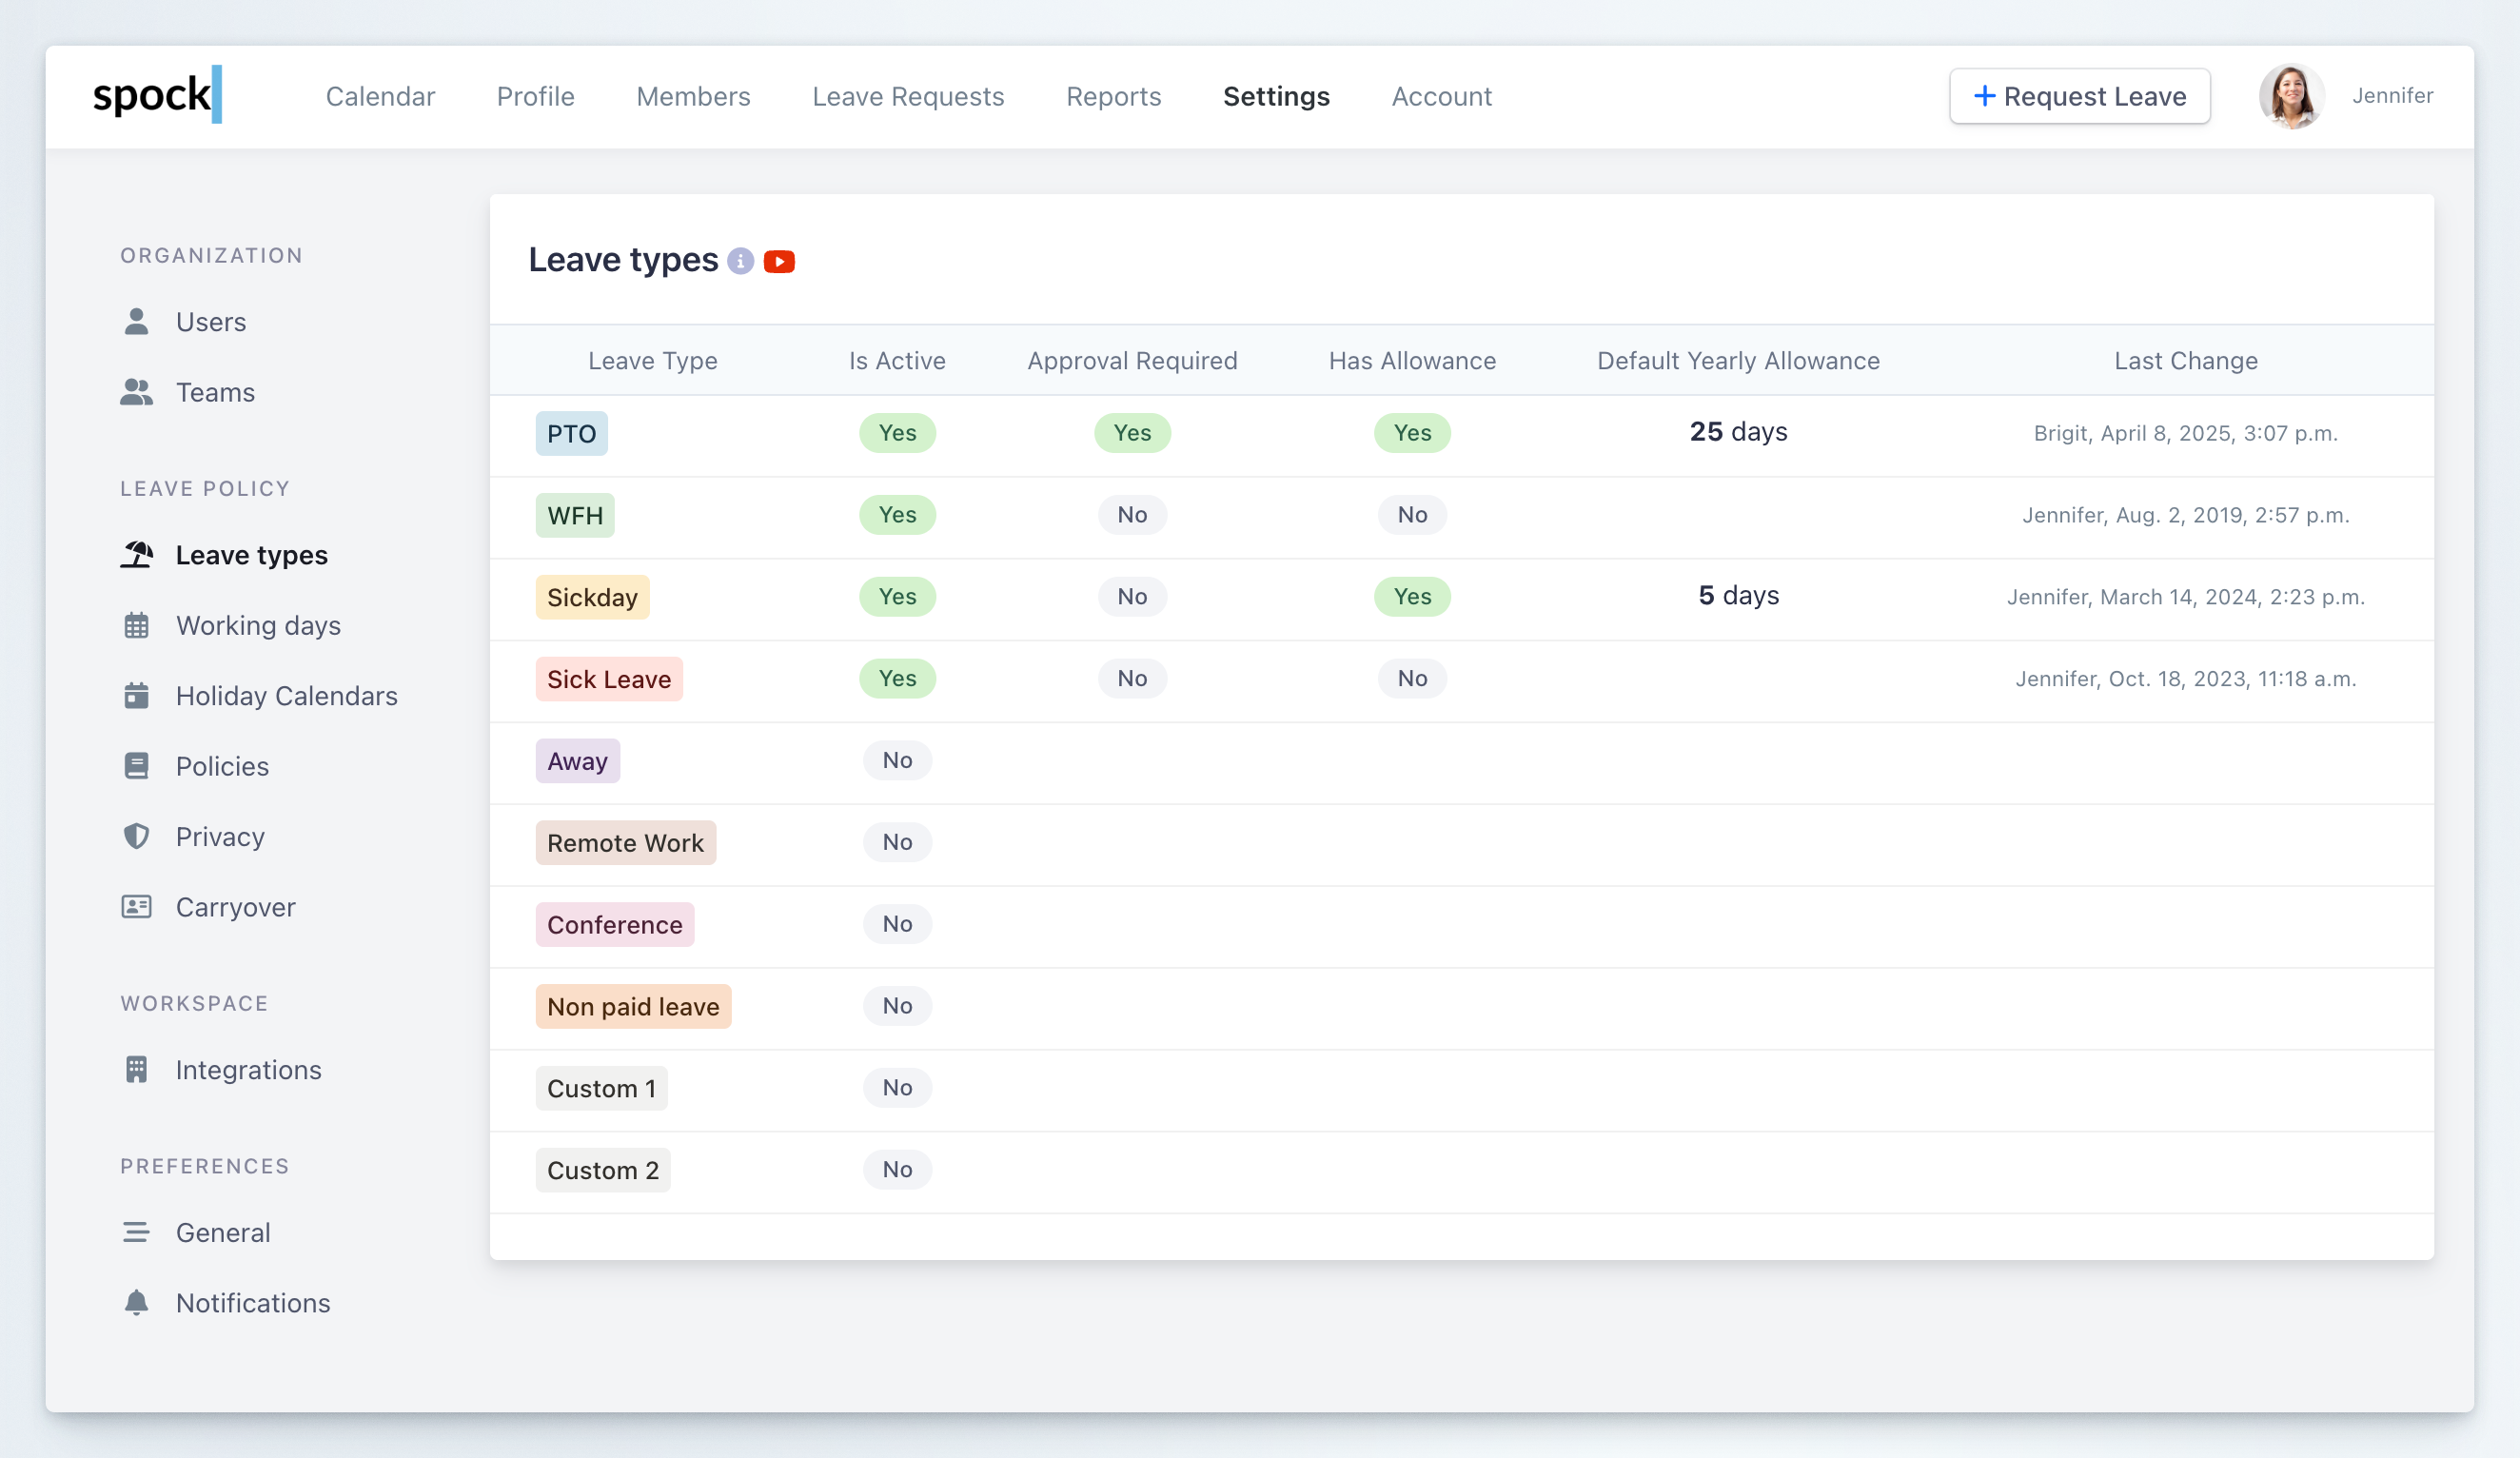 Read detailed documentation on how to setup leave types
### Video: How to setup leave types
Video content would be embedded here in the actual documentation.
## Step 3. Setup Users Roles and Teams
### Assign User Roles
Assign roles to users to distribute application permissions.
Read detailed documentation on how to setup leave types
### Video: How to setup leave types
Video content would be embedded here in the actual documentation.
## Step 3. Setup Users Roles and Teams
### Assign User Roles
Assign roles to users to distribute application permissions.
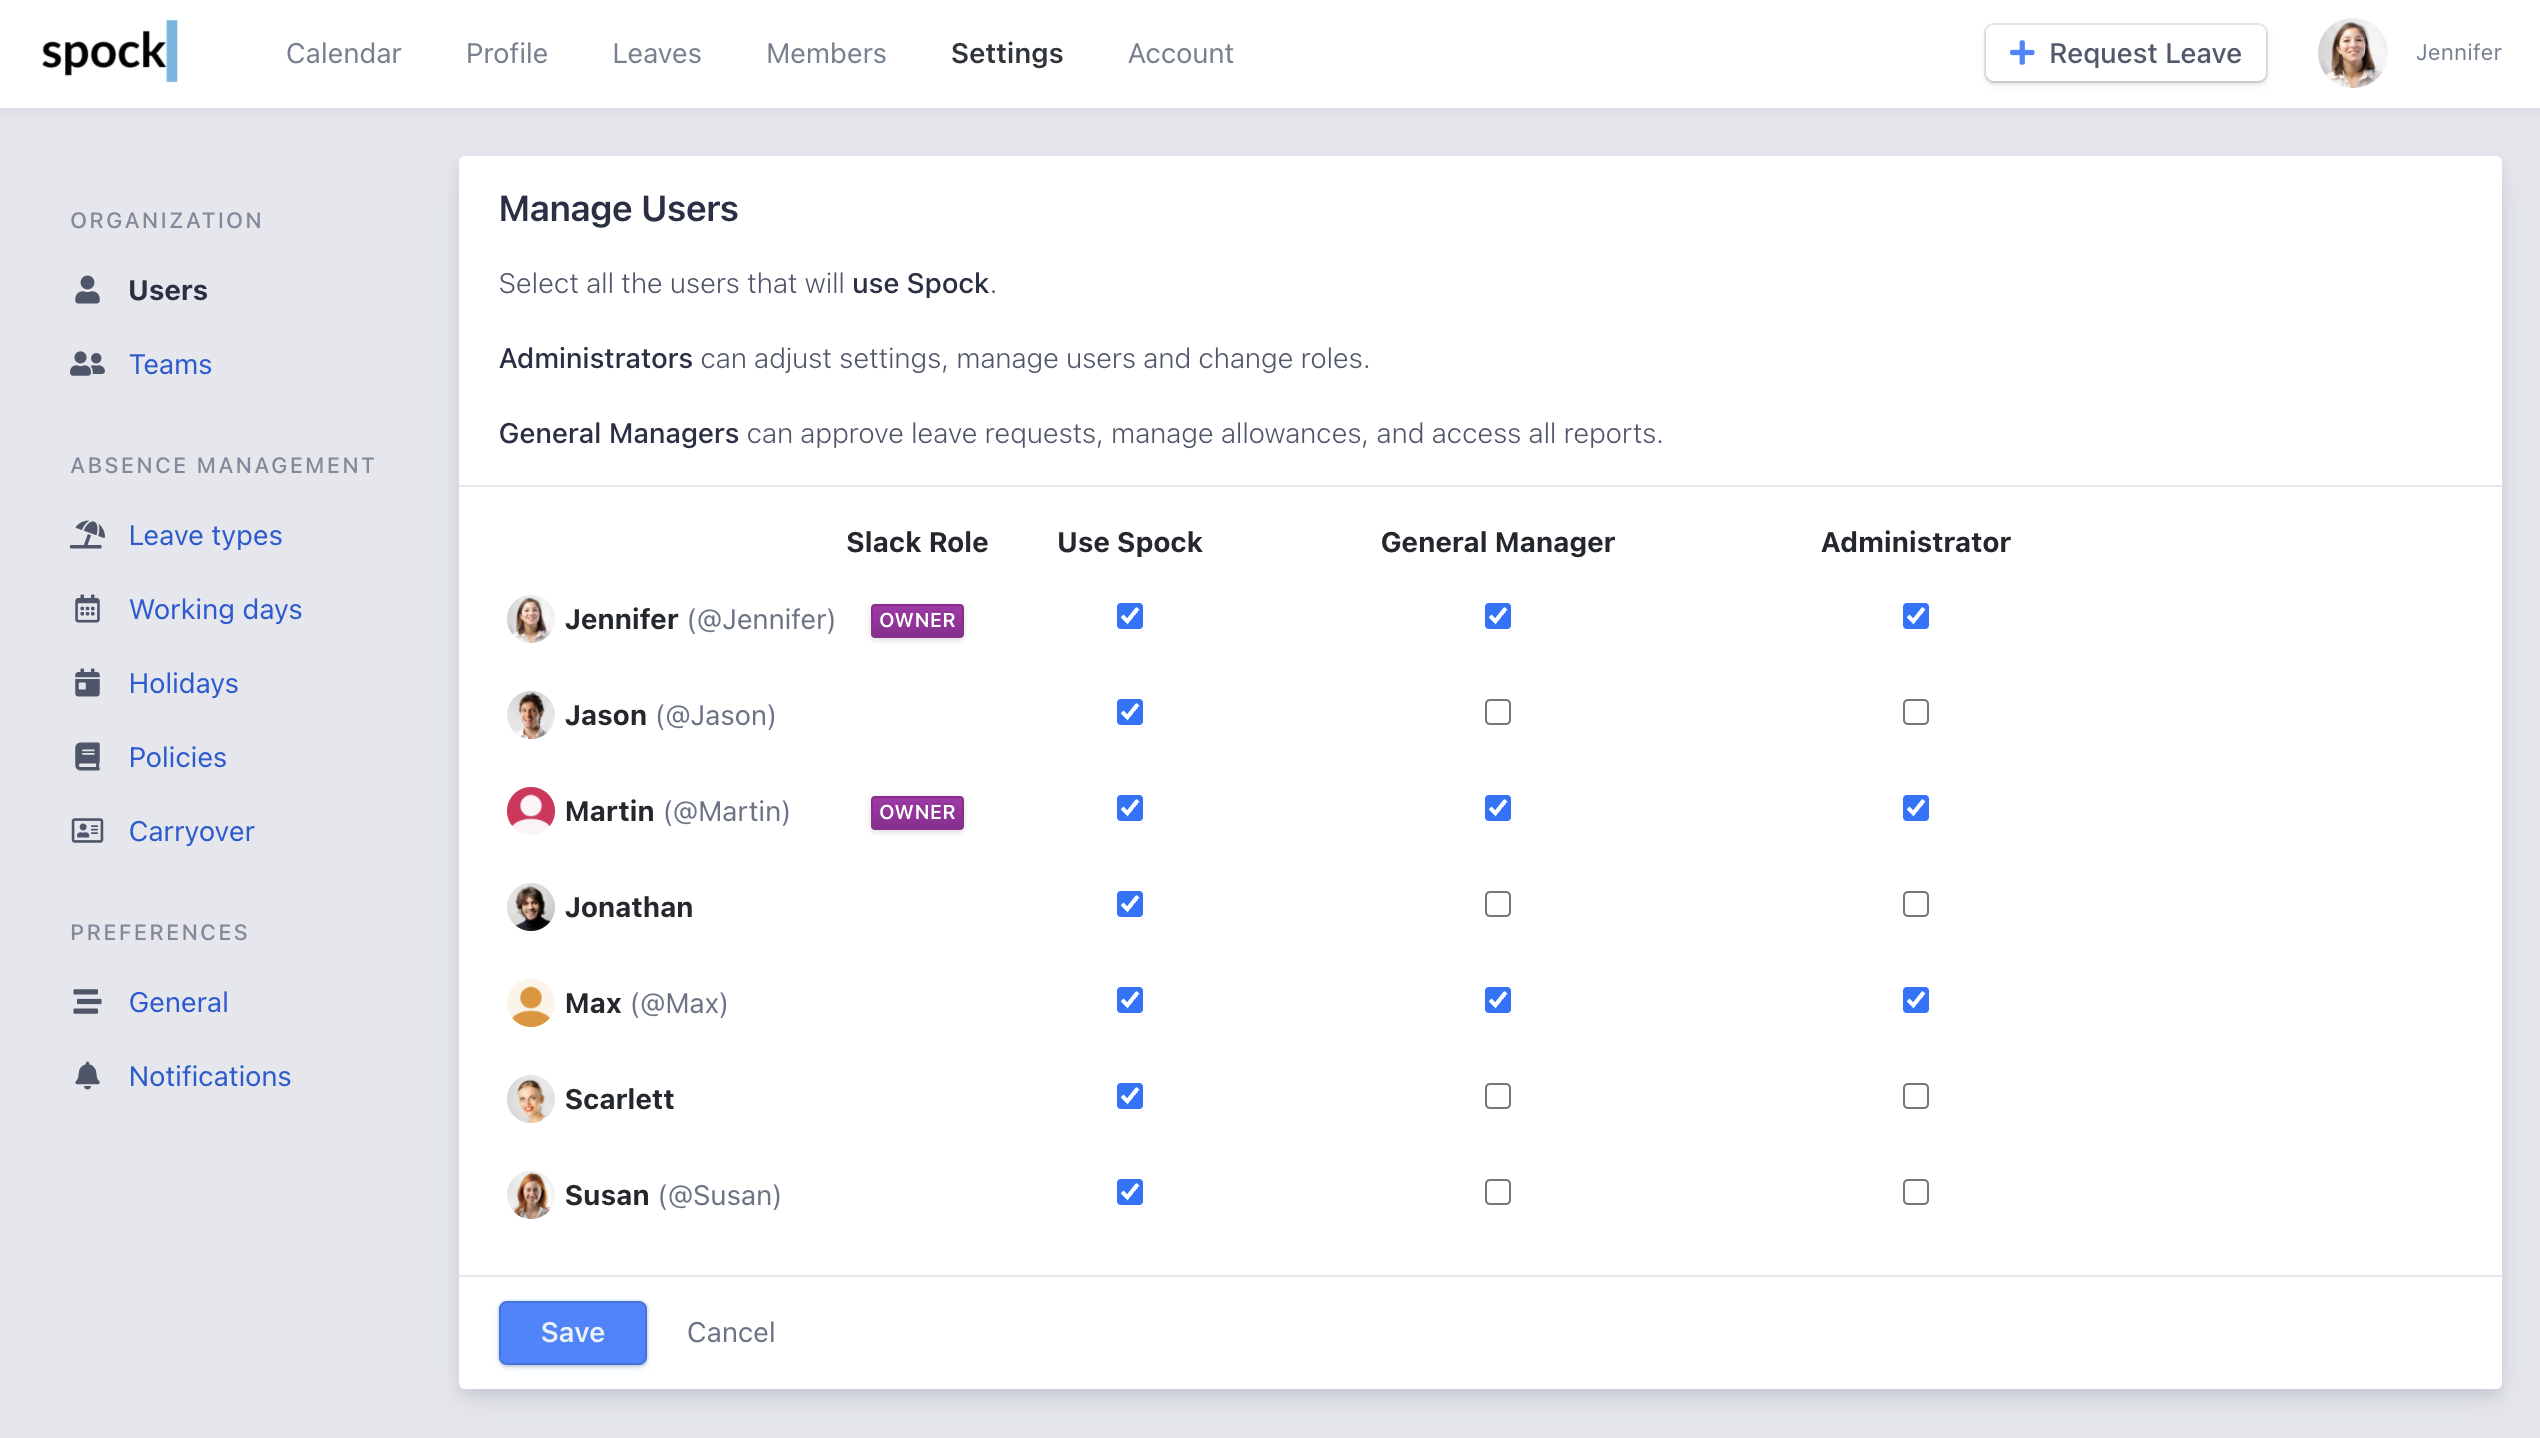 Read more about user administration and role management
### Create Teams
Make teams and assign users to them to create an organizational structure.
Read more about user administration and role management
### Create Teams
Make teams and assign users to them to create an organizational structure.
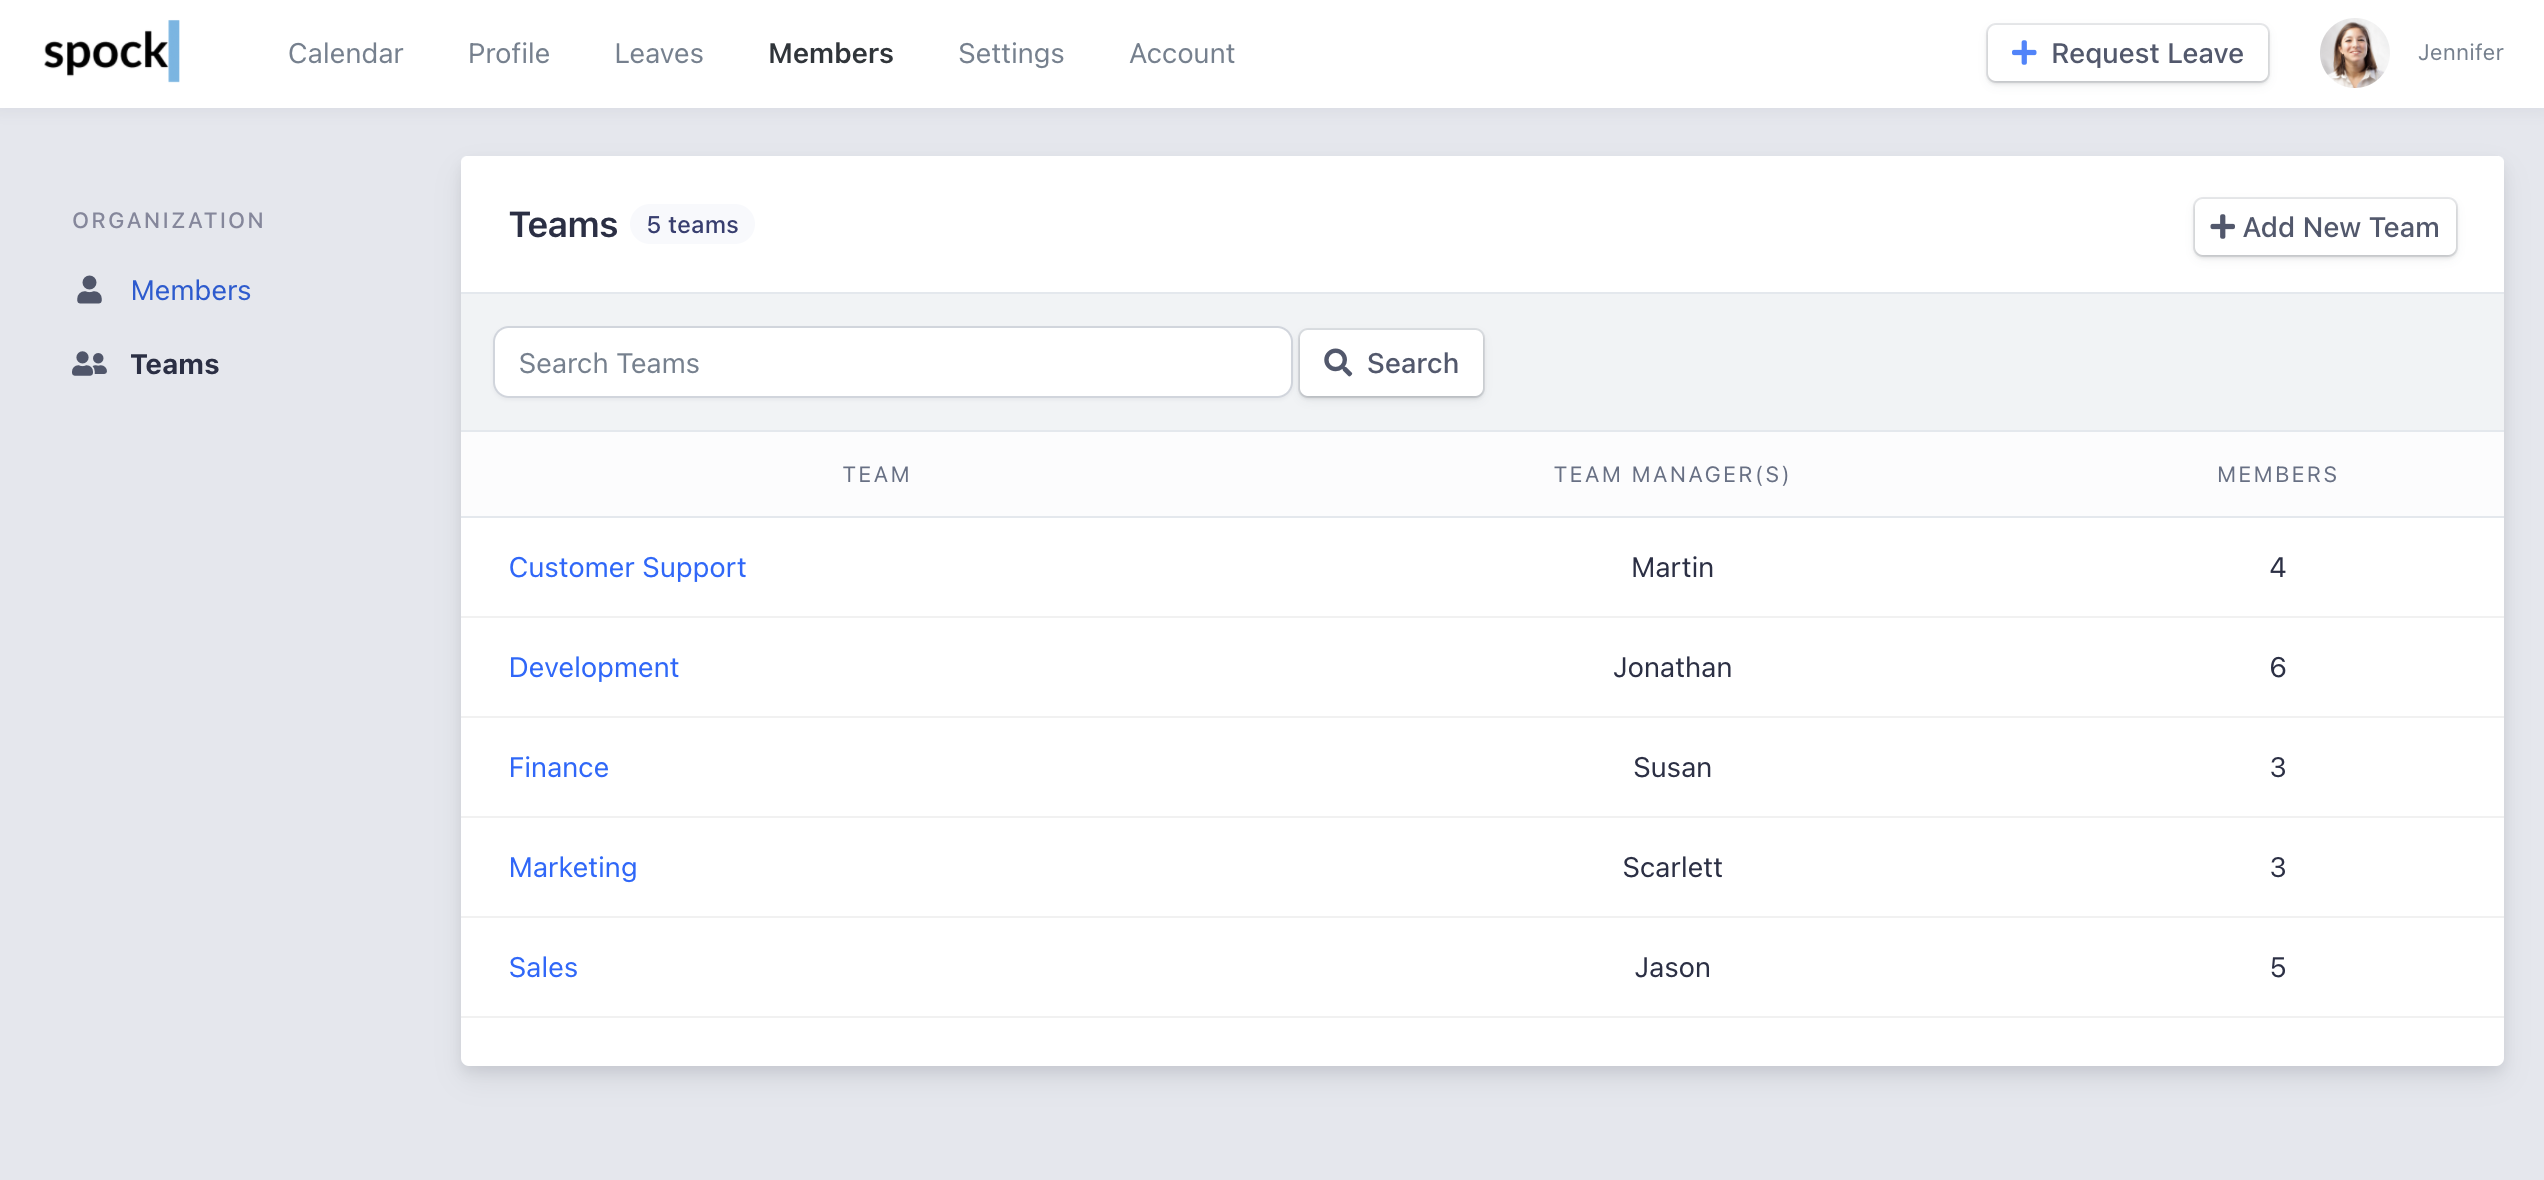 Read more about teams and organizational structure
## Step 4. Request Your First Leave
You can request leave in Slack or via Spock Dashboard. Try to request the first one.
Read more about teams and organizational structure
## Step 4. Request Your First Leave
You can request leave in Slack or via Spock Dashboard. Try to request the first one.
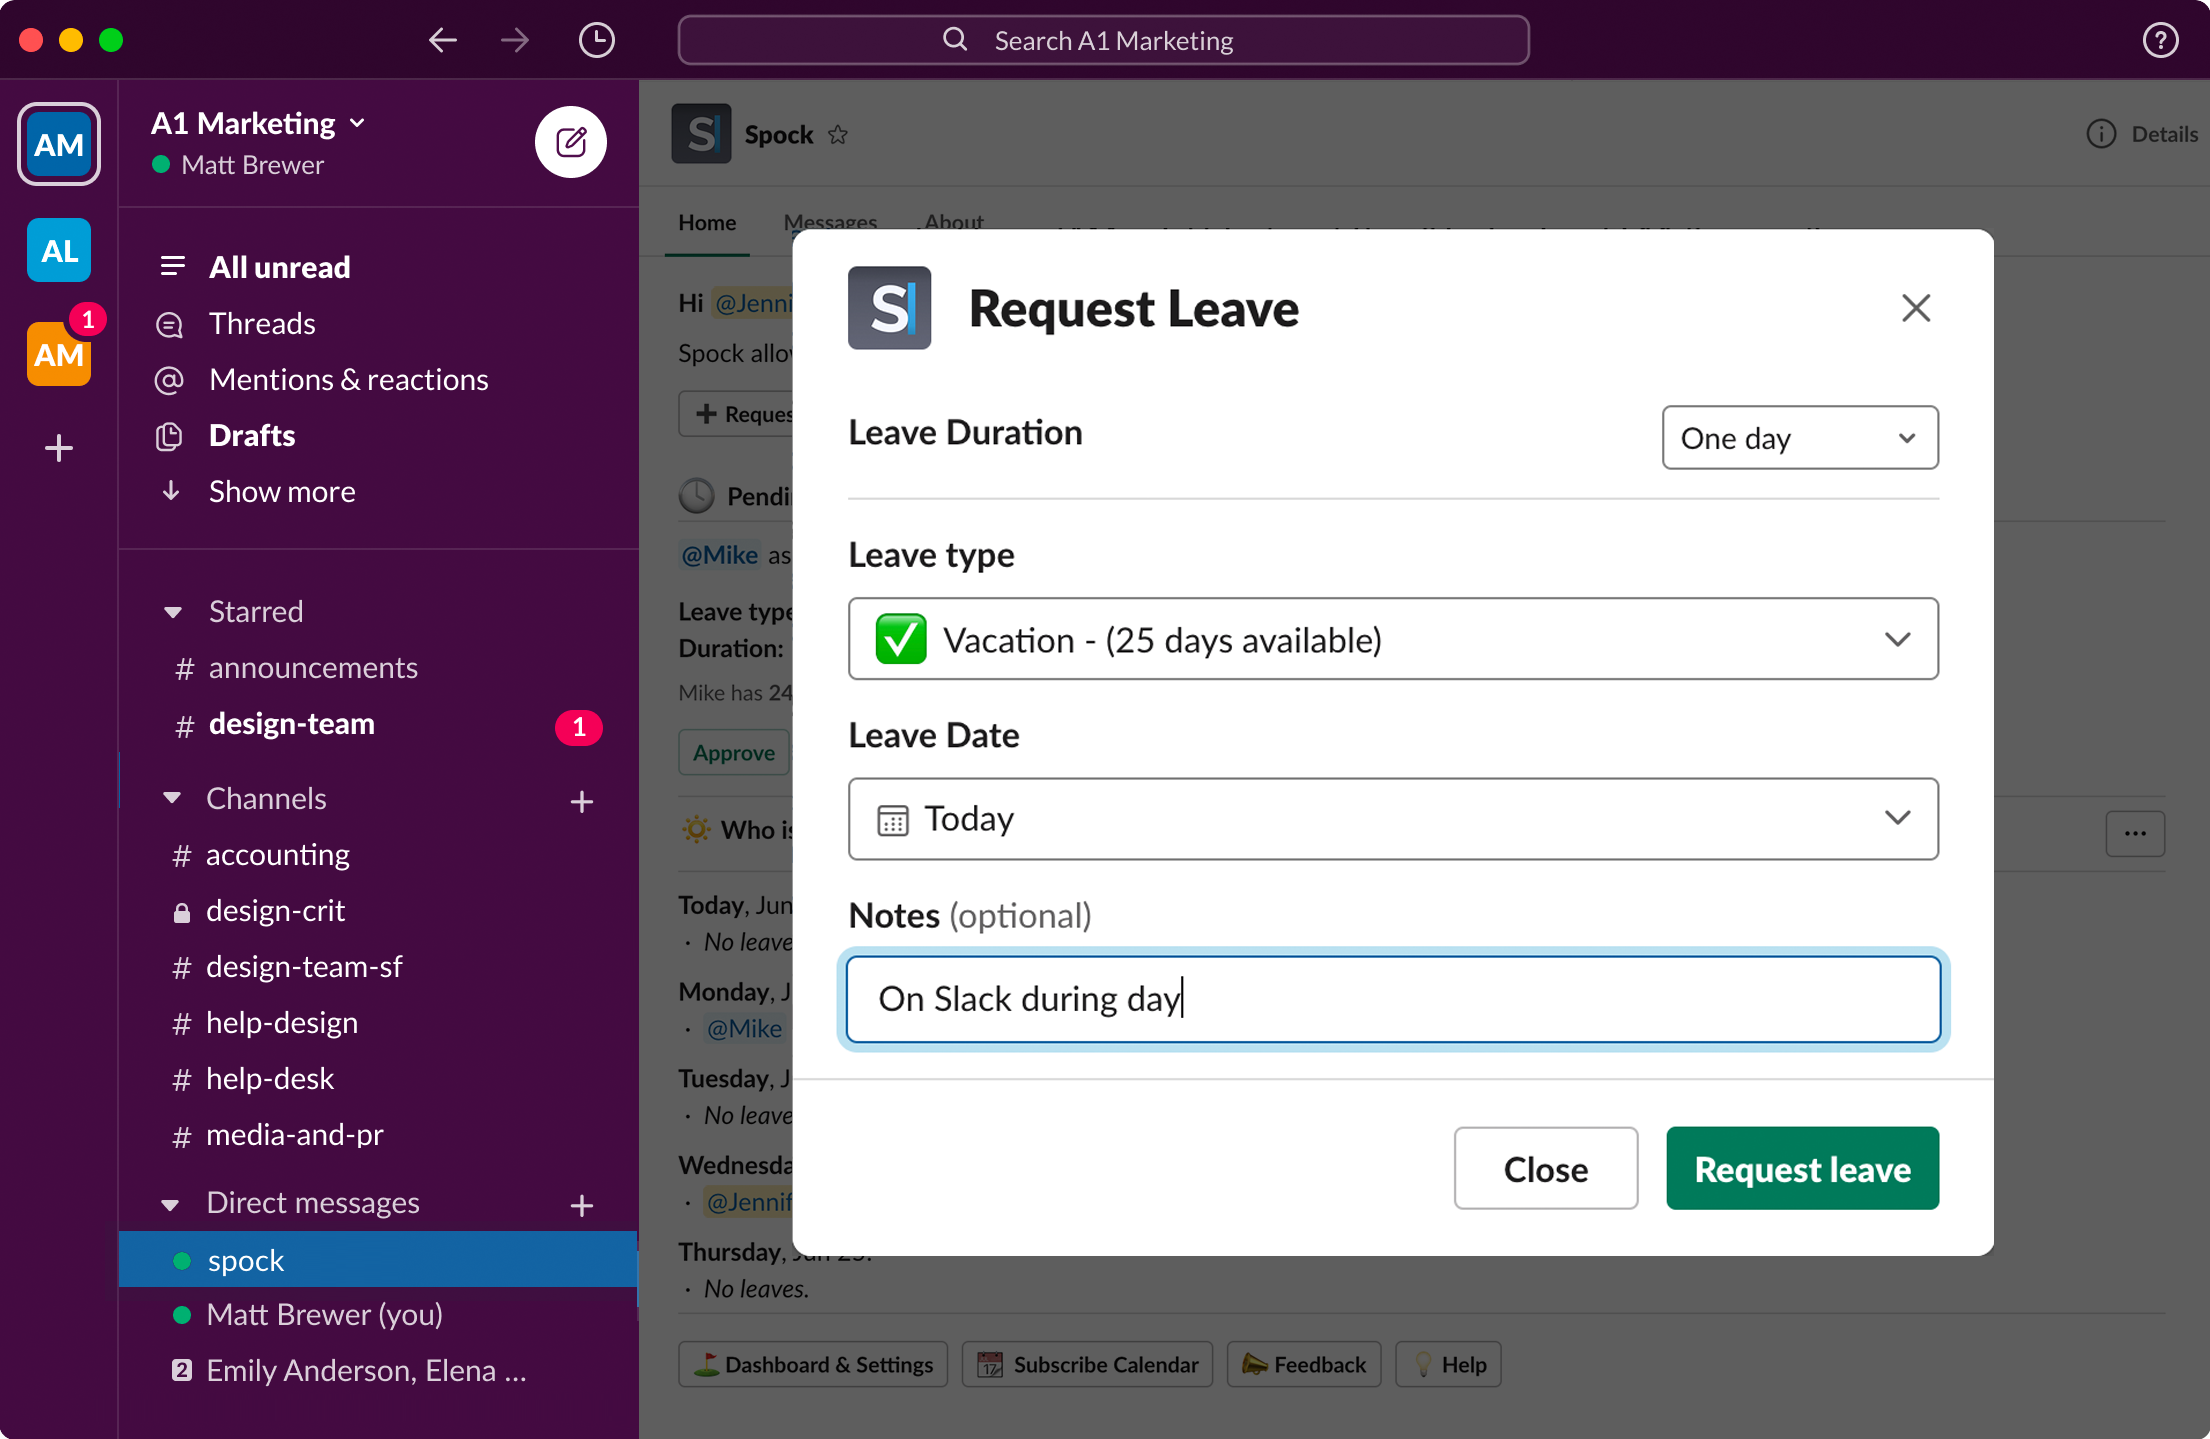 Read detailed guide on how to request a leave
## Next Steps
Now that you have Spock set up, explore these features:
Configure leave types for your organization
Sync Spock with your calendar applications
Set up approval workflows for leave requests
Configure public holidays for your organization
Read detailed guide on how to request a leave
## Next Steps
Now that you have Spock set up, explore these features:
Configure leave types for your organization
Sync Spock with your calendar applications
Set up approval workflows for leave requests
Configure public holidays for your organization